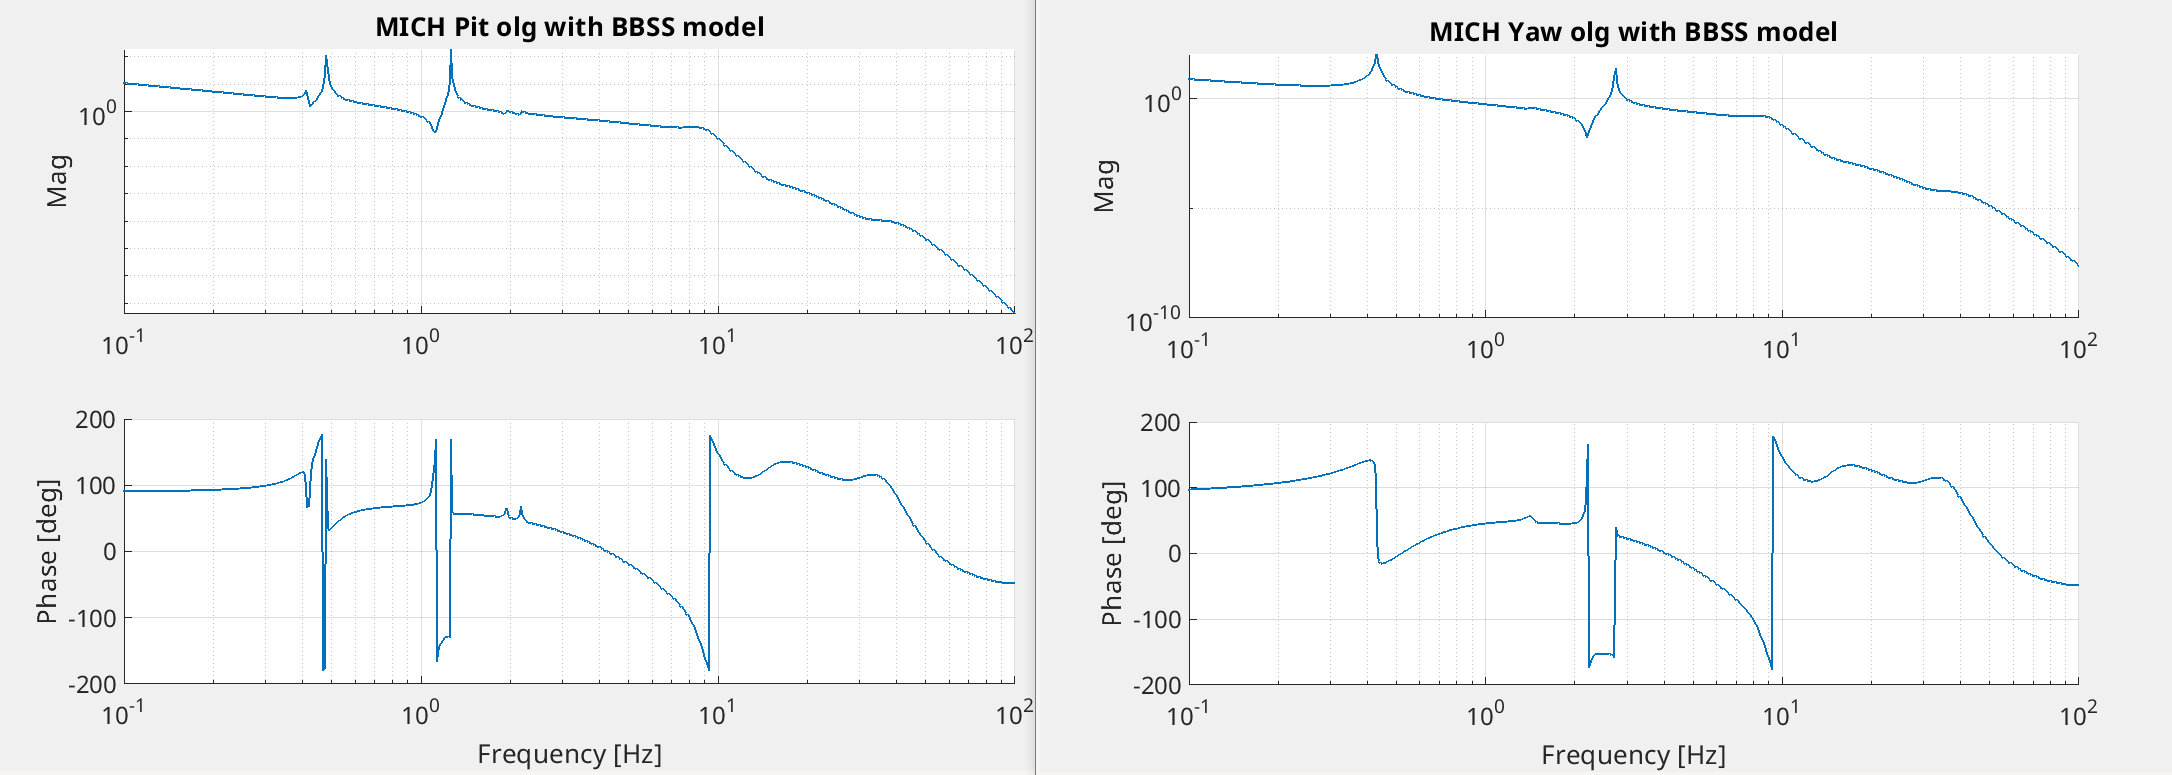
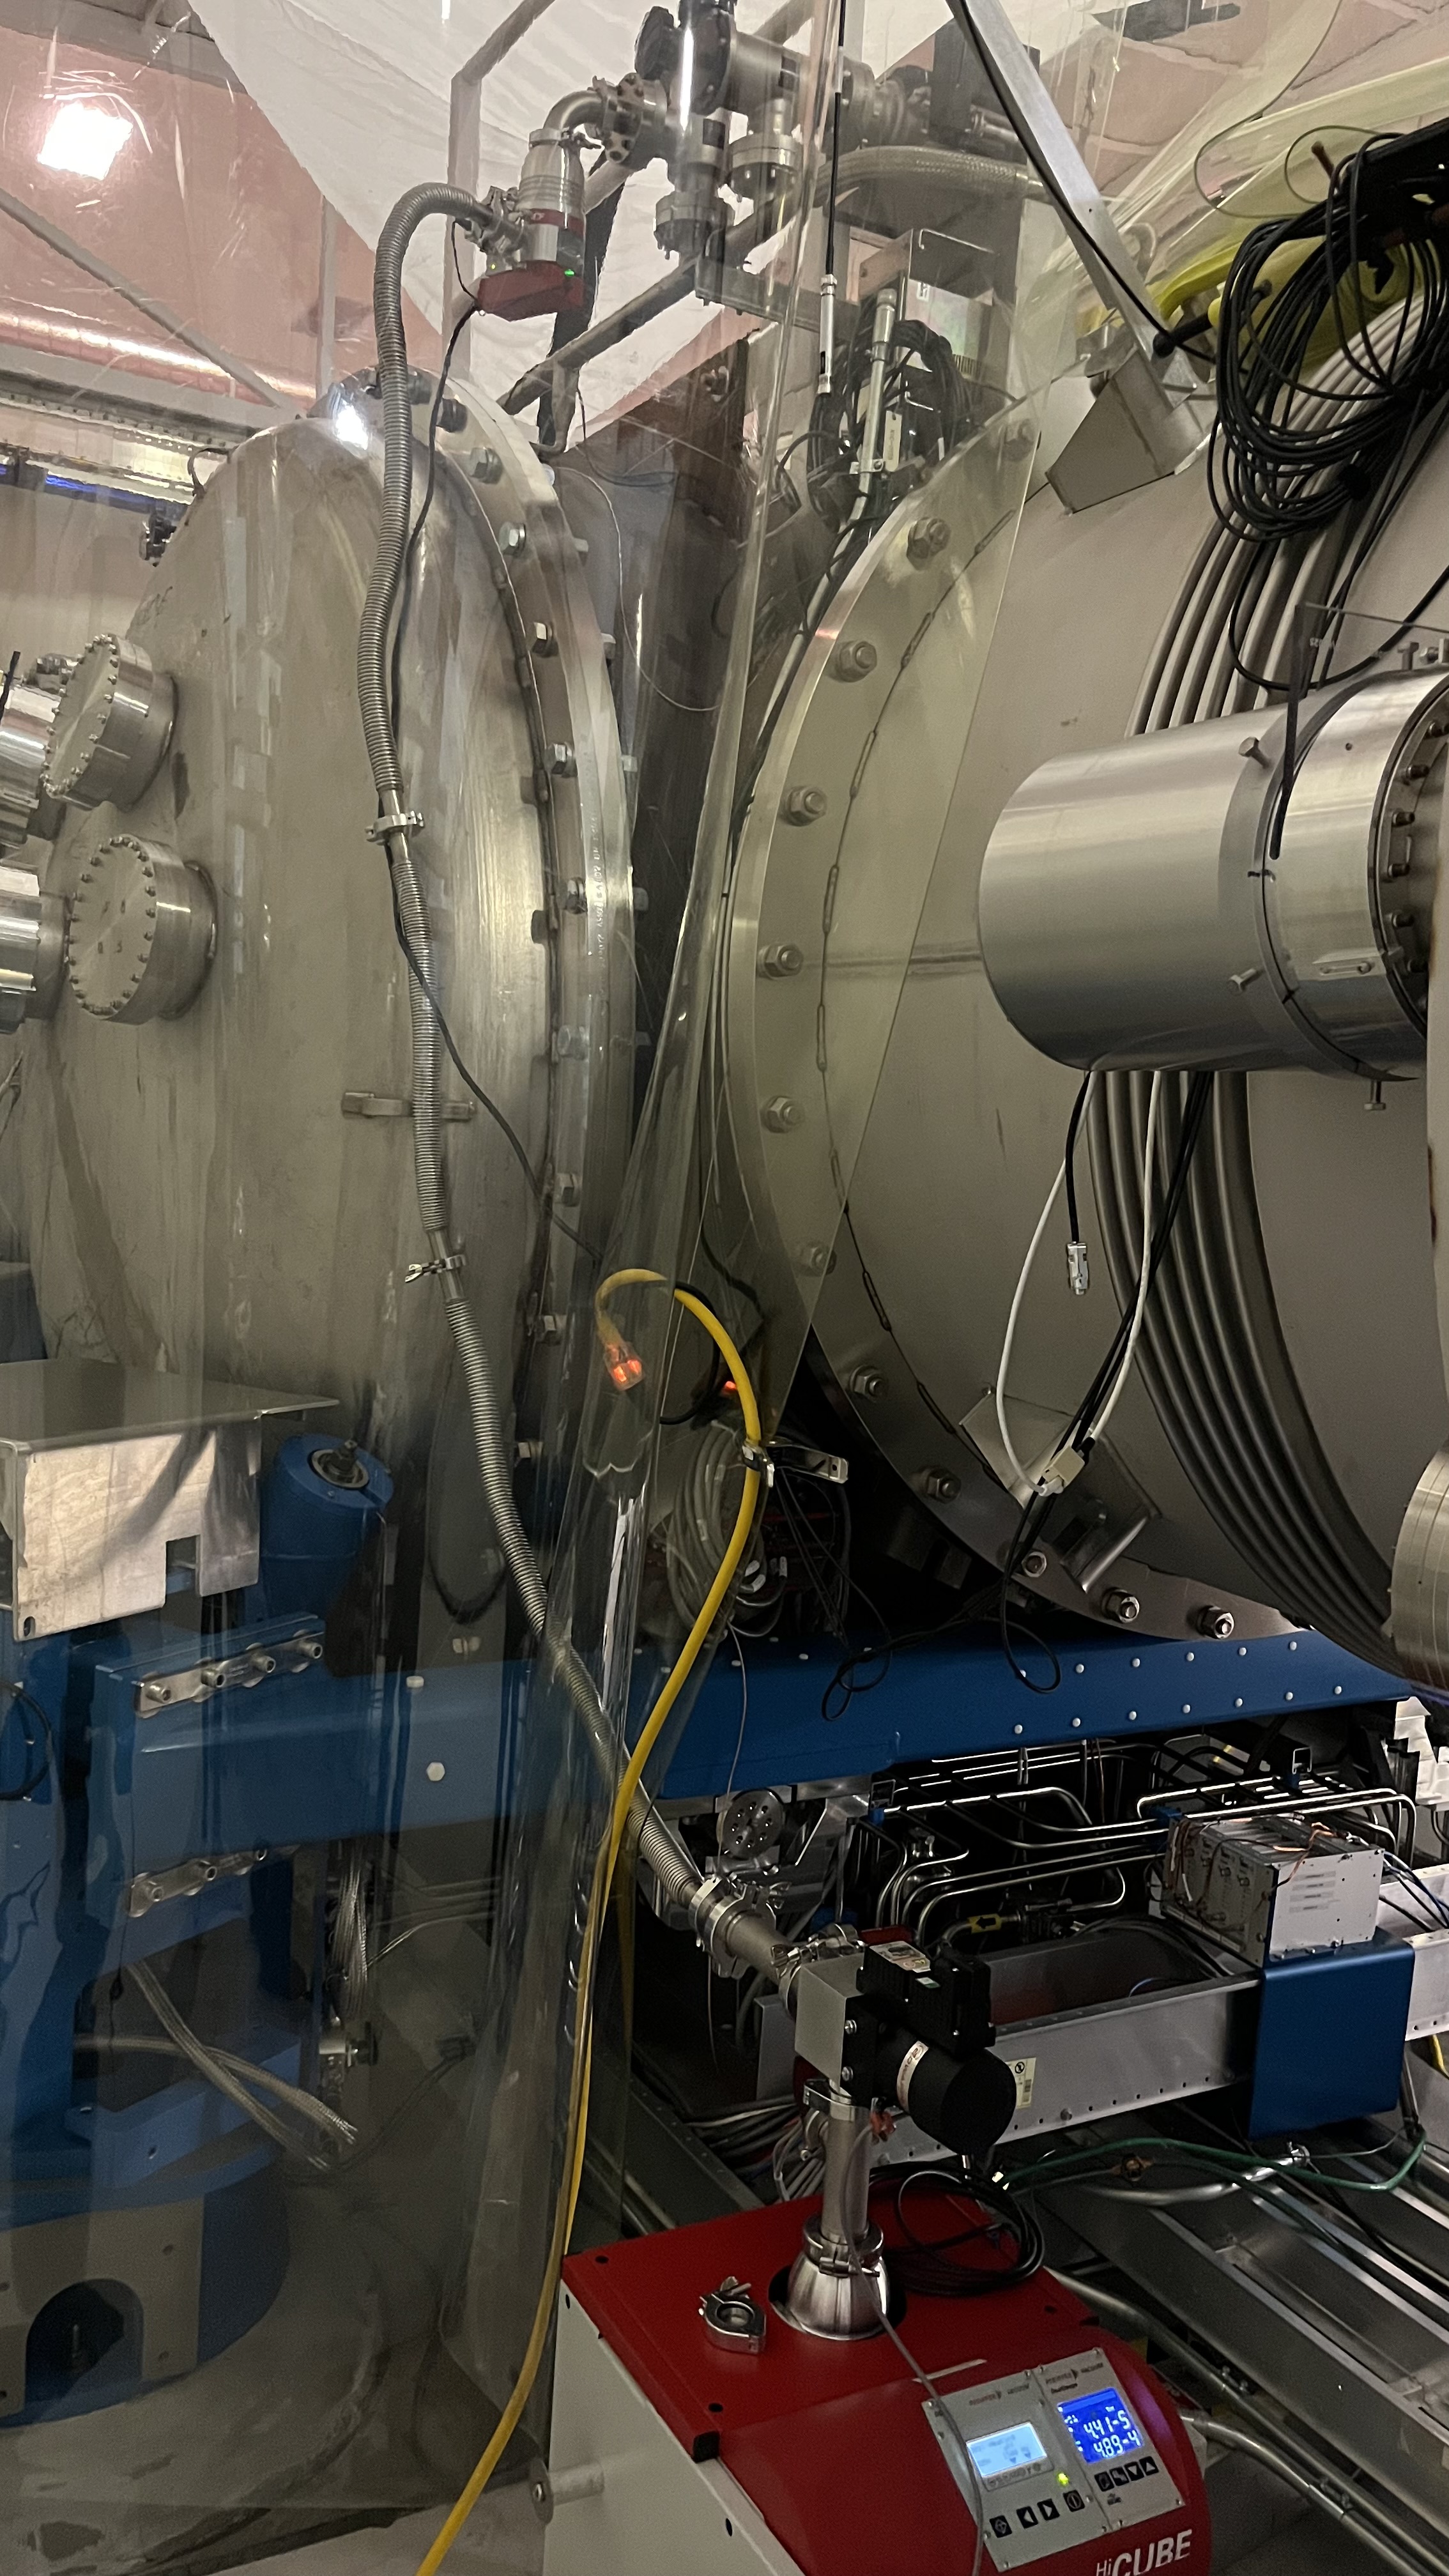
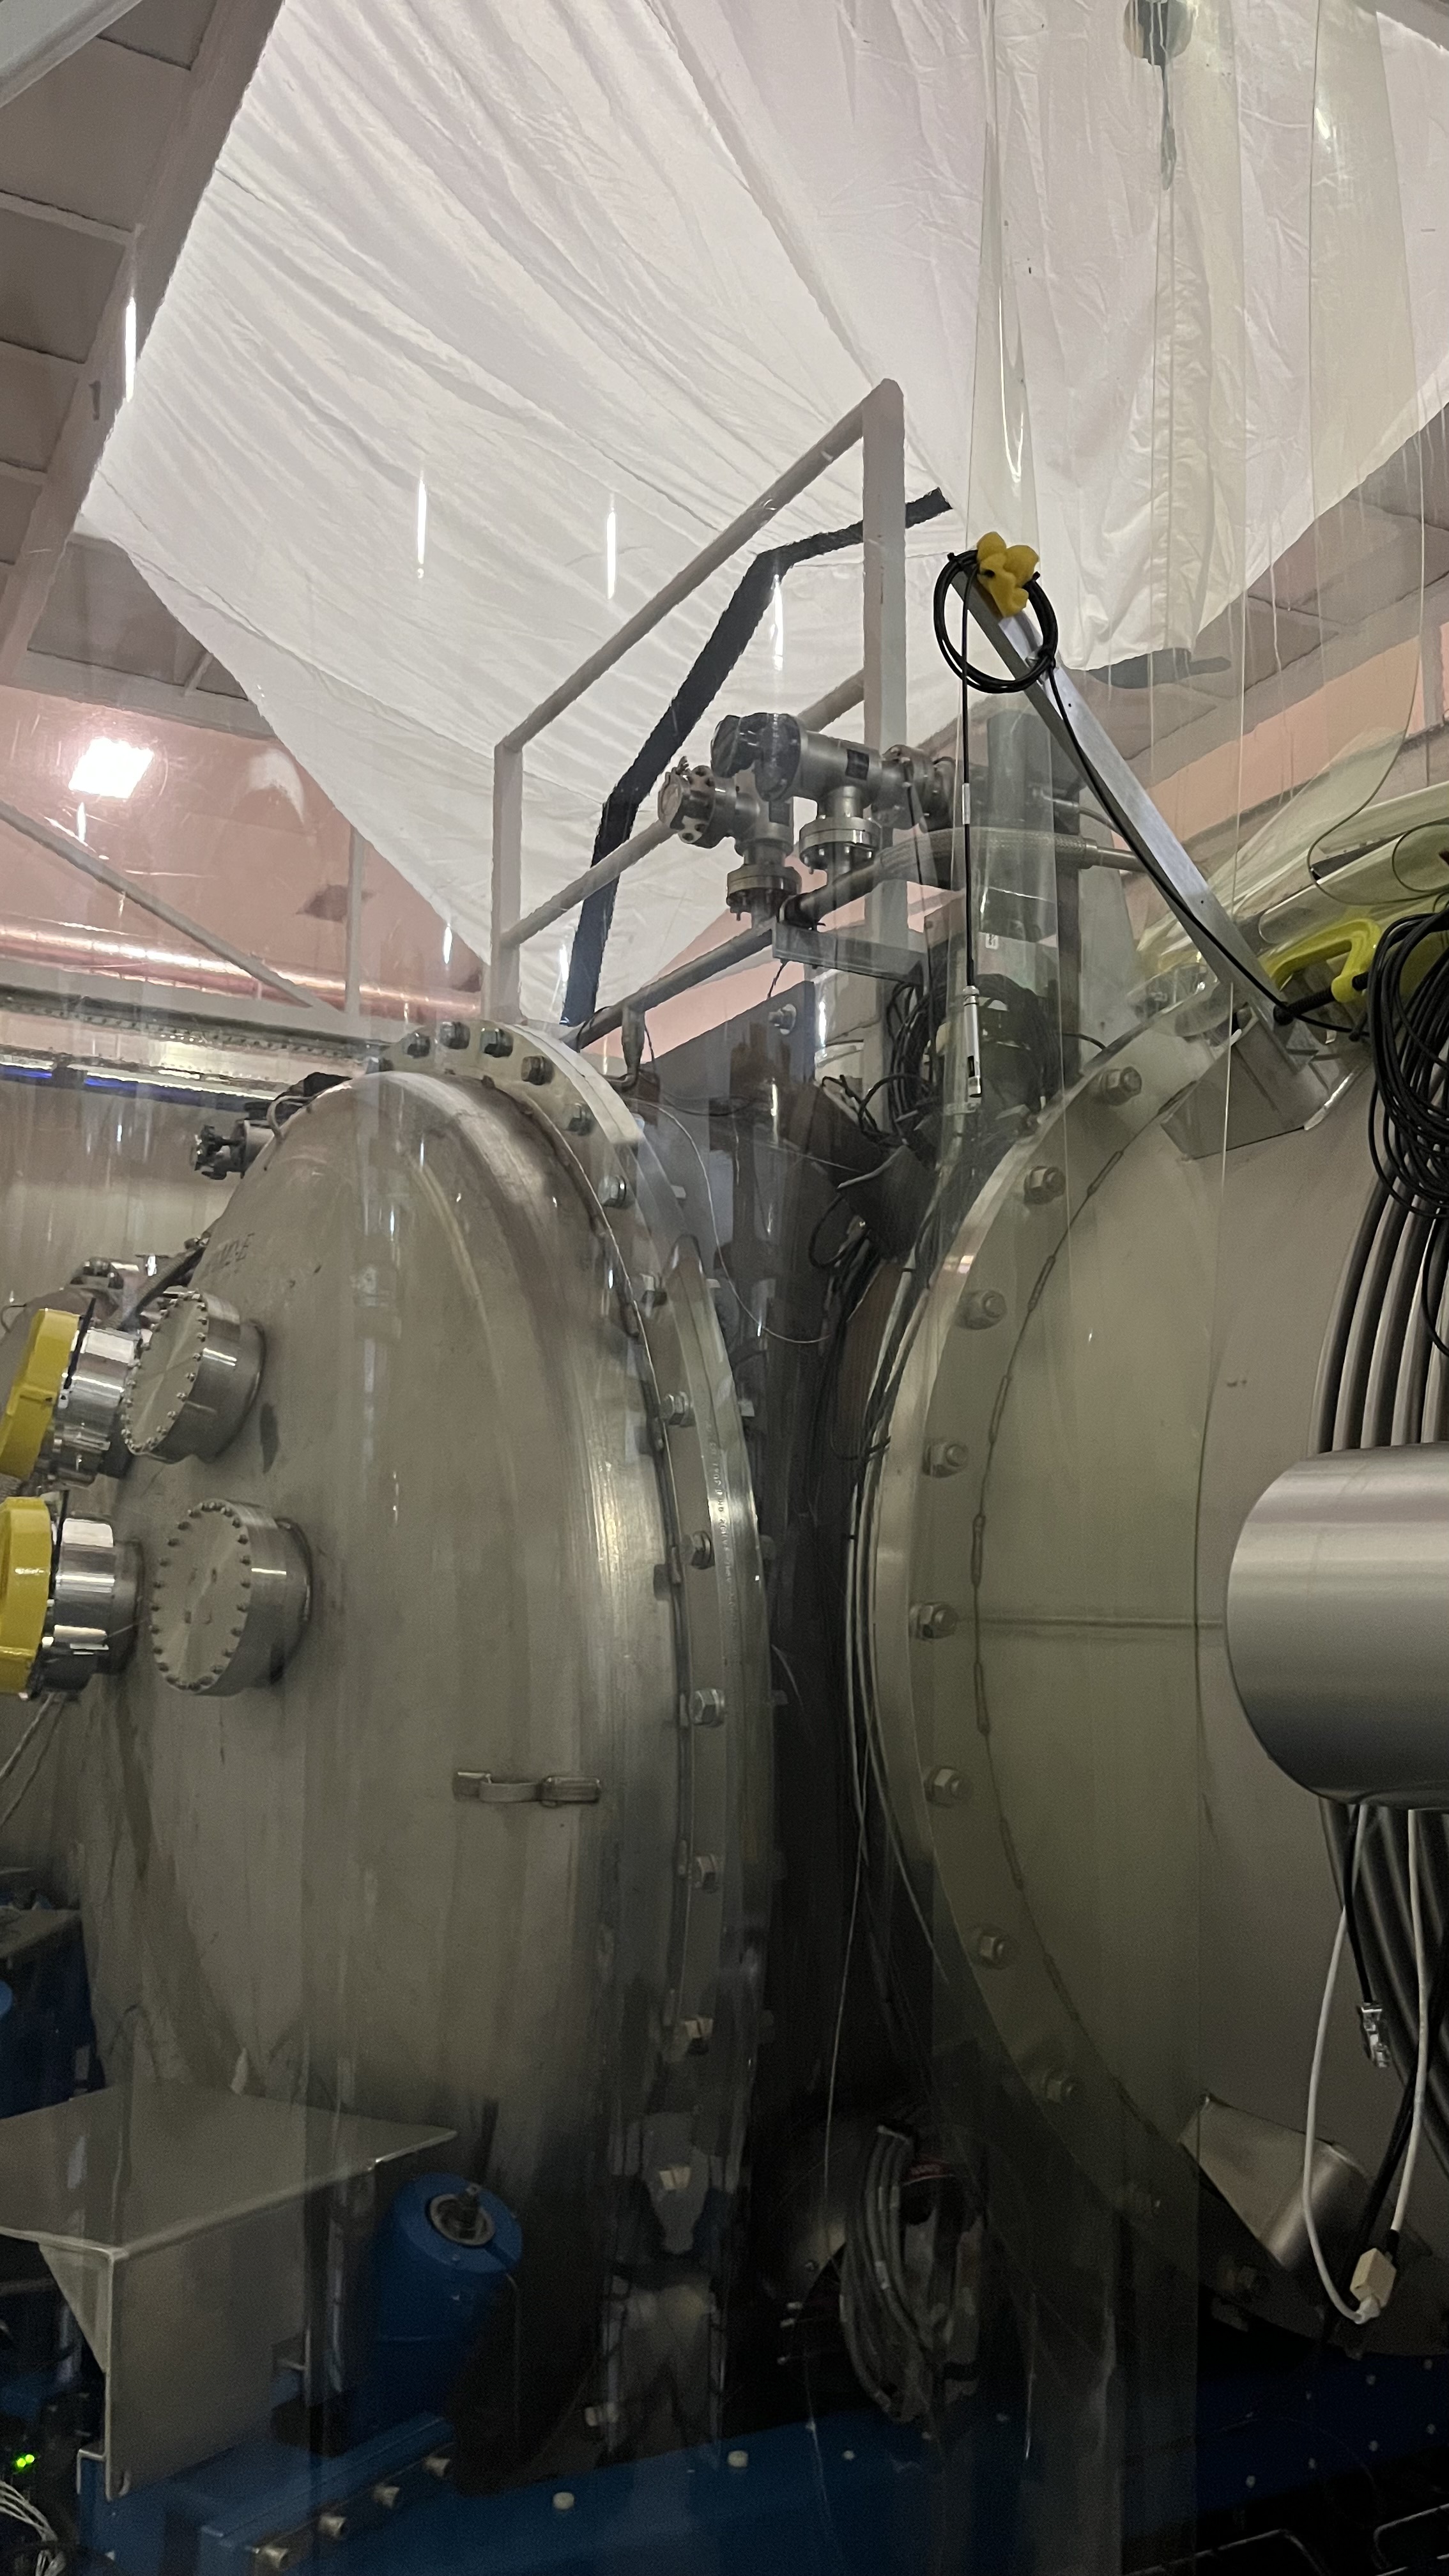
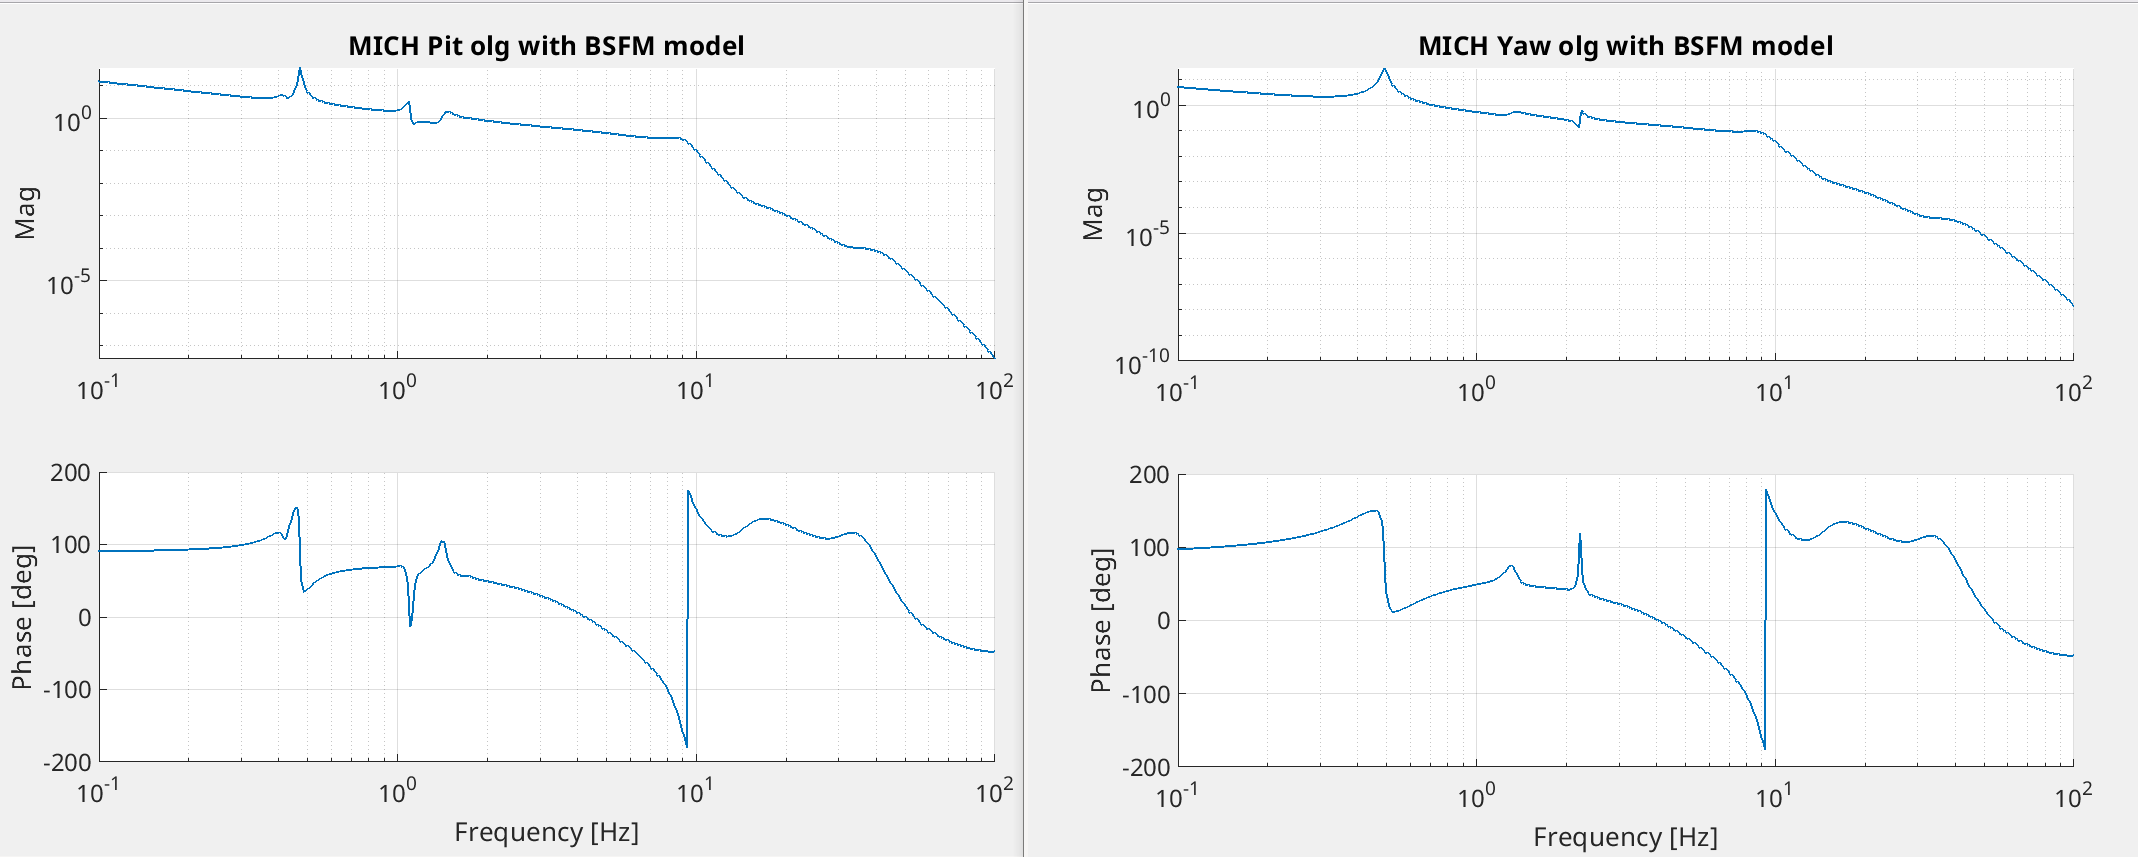
Following a similar process for the length control as in 91028, I used both the BSFM and BBSS model to construct a model of the MICH ASC and check the crossover frequencies.
The most recent ASC OLG measurements of MICH P and Y are in userapps asc/h1/templates/MICH. MICH P UGF is roughly 2 Hz, MICH Y is roughly 0.7 Hz. Using the BSFM model and this information, I once again assumed the optical gain of the MICH ASC would be the same and calculated a rad/ct calibration factor to use with the BBSS model. Note that these UGFs are from full power lock, so I'm not certain what the MICH ASC OLGs look like in DRMI lock.
The BSFM model also says that both P and Y have a 22 mHz crossover between M1 and M2.
Using these calibration factors show that we might have some trouble running with the exact same MICH ASC design with BBSS. I think this is because the MICH ASC design contains a pretty extreme BSFM plant inversion. We could replace it with a BBSS inversion, or use this opportunity to move to a slightly different design principle that doesn't require precise plant inversion.
The model also suggests that the yaw crossover from M1 to M2 will be about 22 mHz as before, but shows the pitch crossover would now be 8.5 mHz. I need to confirm I am using the correct lever arms for the calibration to make sure I haven't made a mistake there. Either way, we can confirm the crossover with an injection.
Just as with length, we would need to slightly adjust the locking filter design if we want to move to M1 and M3 actuation, but in principle I don't see any issue with driving from M3 instead of M2 for ASC as well. This would be in line with how we drive all other triple sus for ASC.
First attachment shows the MICH ASC in the BSFM model, second in the BBSS model.
Post upgrade the CDS Overview was showing an issue with h1iopomc0's timing card. On further investigation we found that this timing card is a very early rollout of the V5 firmware, upgraded back in Feb 2025 for DT-frequency changes. The actual issue is that RCG5.65 is more accurately calculating the duotone crossing for h1omc0's low-noise ADCs. This value was +0.1uS pre-upgrade and now is -5.625uS with only nano-second variation. The CDS overview was using the DT crossing time as an indicator of timing card firmware version. V3 had DTs between +7uS and +8uS, V5's are in the -1uS to +1uS range.
I've changed the CDS Overview to extend the lower limit of acceptible DT timings to -6uS. No further action is required.
Rachel and Elenna:
The goal of this project is to better understand the DARM loop design that was used during O4b and evaluate how well it performed. By identifying where the design worked well and where we observe limitations, we can gain insight into potential improvements for future DARM loop designs.
To do this, I recreated the pydarm.plot.critique() function using valid O4b calibration reports (H1: 20250111T193645Z and L1: 20250102T163026Z). I then broke the DARM loop down into its individual components to understand how each stage contributes to the overall control performance.
The analysis includes comparisons of the open-loop gain (OLG, (G)), the suppression function (1/(1+G)), the digital_out_to_displacement actuation transfer functions, the lock_in_to_displacement actuation transfer functions, annotated crossover frequencies, and the frequency ranges over which each actuation stage dominates.
Several notable differences emerge between the H1 and L1 DARM loops. H1 has a lower unity gain frequency (72.2 Hz vs. 86.0 Hz), a lower low-frequency OLG magnitude, and substantially less phase margin (22.5º vs. 34.3º). The reduced phase margin is also reflected in the larger gain peaking observed in the suppression function. Regardless of how future DARM loops are offloaded, increasing the available phase margin should be a primary design objective.
The actuator comparisons show that the overall stage hierarchy is similar between the detectors, with the UIM dominating at low frequencies before the TST becomes dominant above approximately 17 Hz. However, the lock_in_to_displacement transfer functions reveal more complicated interactions between the UIM, PUM, and TST at low frequencies than are apparent from the digital_out_to_displacement transfer functions alone.
See: LIGO-G2601606 for slides.
TITLE: 08/03 Day Shift: 1430-2330 UTC (0730-1630 PST), all times posted in UTC
STATE of H1: Planned Engineering
OUTGOING OPERATOR: None
CURRENT ENVIRONMENT:
SEI_ENV state: CALM
Wind: 4mph Gusts, 2mph 3min avg
Primary useism: 0.01 μm/s
Secondary useism: 0.09 μm/s
QUICK SUMMARY:
IFO status: Currently Unlocked. Both GV5 and GV7 are shut..... for now.
Corner pump down continues.
Spool cameras work to reinstall IR cameras.
More Distributed acoustic sensing DAS system.
Following yesterday's swap of h1sush12's IPC fiber and switch-SFP (port3) 23 hours ago there have been no IPC errors from this frontend. Also the 25GE switch (sw-msr-ipc0 port3) shows zero packet errors.
h1syscsauxsdf had gotten stuck, I restarted it on h1ecatmon0.
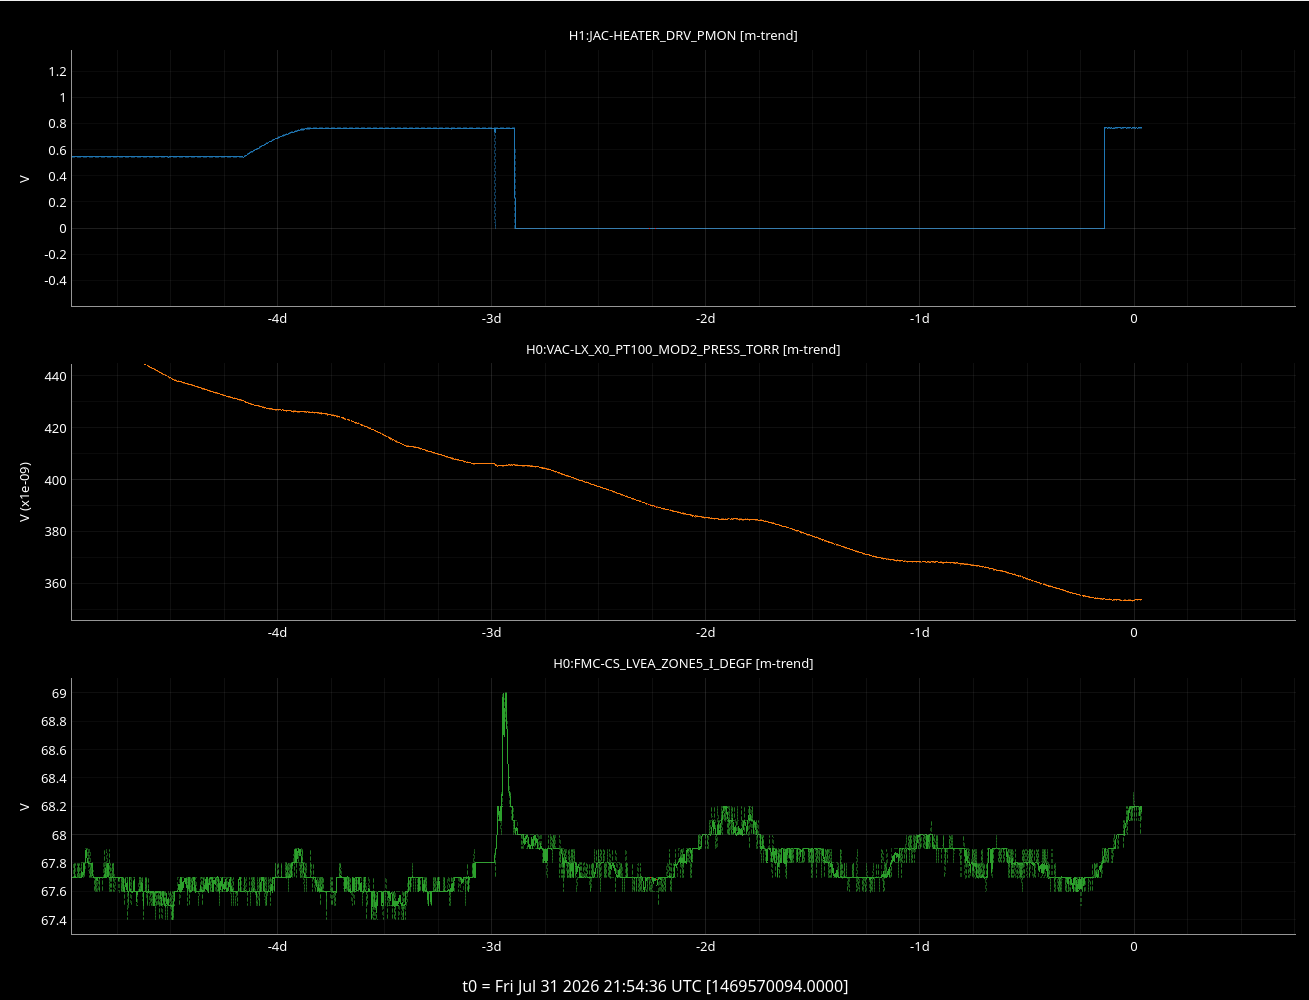
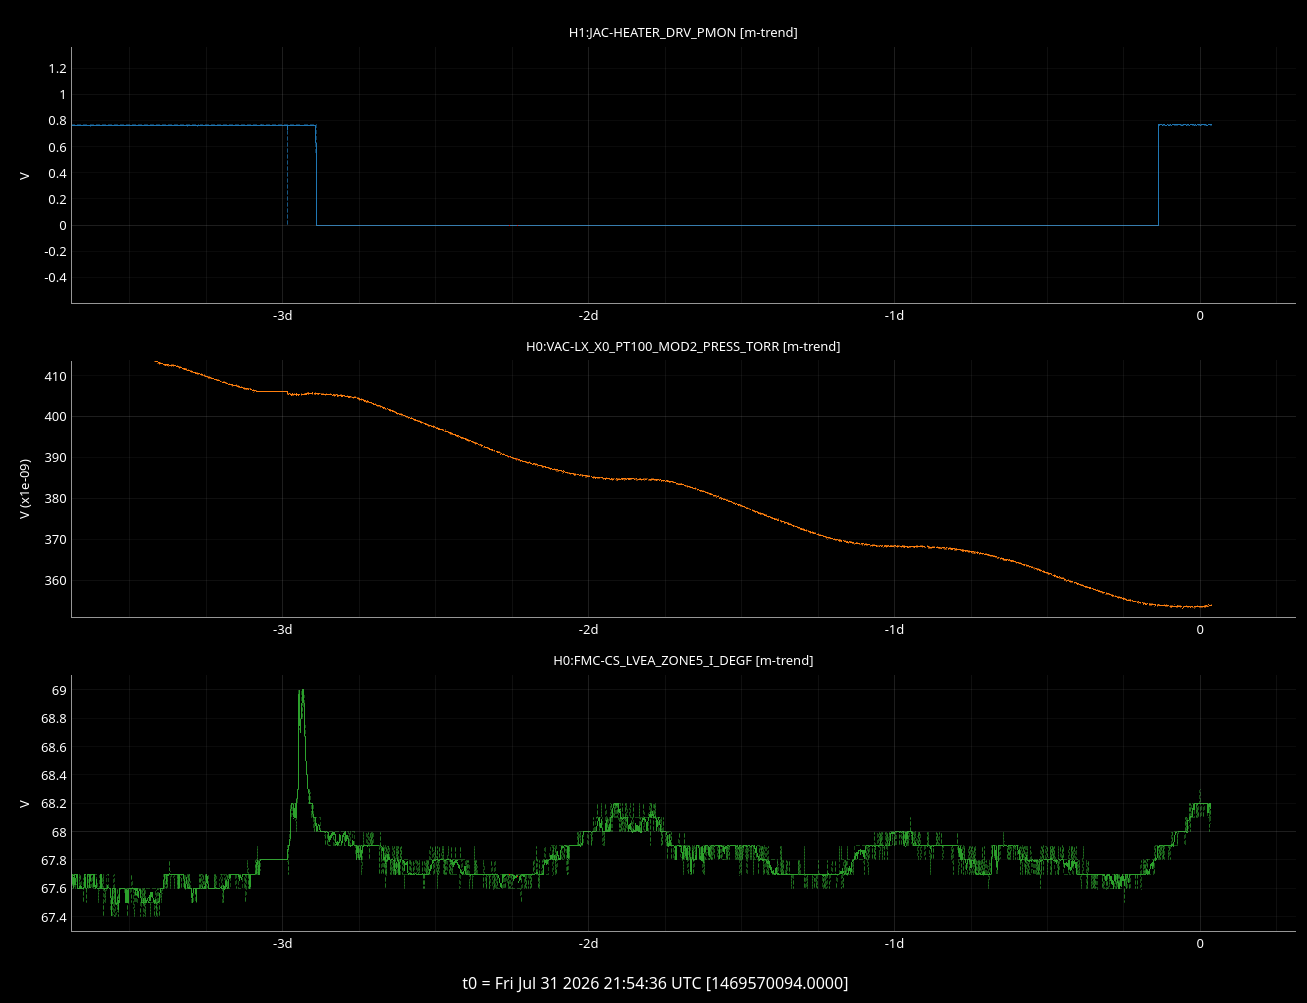
Keita turned on the JAC heater this afternoon. Attached plot has the first cursor at the time of 91296, the second cursor at the time when Keita turned on the heater, they both happened at the same point in the diurnal pattern where the termperature rises.
Keita has now turned the heater off before people leave for the weekend, because we can't say it's not causing the pressure to rise. Let's repeat this earlier in the day on Monday.
Actually I turned the heater back on shortly after I turned it off on Friday because the pressure rise that some were worried about looked like diurnal change to us and it was already peaking at the time.
I monitored the pressure on Friday evening and it was good, it was good on Saturday too so I kept the heater ON over the weekend. No need to turn it off from this point on.
TITLE: 07/31 Day Shift: 1430-2330 UTC (0730-1630 PST), all times posted in UTC
STATE of H1: Planned Engineering
SHIFT SUMMARY: The final bits of the CDS upgrade continued today, as well as some SQZ and michelson commissioning. The LVEA is currently in Operations SAFE.
The corner station continues to be pumped down, pressures are around 4e-7torr. The HAM1 pressure has been a concern when using the JAC heater this week, but I think we may have been scaring ourselves. The HAM1 pressure changes diurnally regardless of whether the heater is on or off. We have seen a pressure response from turning on the heater, but this diurnal effect might be the dominating factor. Looking at LVEA temps around HAM1 it tracks well with the local temperature.
LOG:
| Start Time | System | Name | Location | Lazer_Haz | Task | Time End |
|---|---|---|---|---|---|---|
| 13:33 | DAS | Jenne, Wanda, Shoshana, Gizem | Yarm, Xarm inside | N | Hitting things with hammer | 17:09 |
| 16:05 | CDS | Jonathan | MSR | n | Troubleshooting iopsush12 | 16:13 |
| 16:12 | FAC | Kim | LVEA | n | Tech clean | 17:13 |
| 16:21 | SUS | Ryan C | CR (Ends) | n | EX & EY sus charge meas. | 18:03 |
| 16:38 | SQZ | Sheila, Rahul | LVEA | LOCAL | SQZ alignment with refurb ZM5 | 19:38 |
| 17:37 | VAC | Gerardo, Travis | EY | n | BSC6 annulus work | 18:25 |
| 17:39 | VAC | Gerardo | LVEA | n | Grabbing lifting hardware for EY | 17:49 |
| 17:57 | ENG | Betsy | Opt Lab | n | Parts | 18:03 |
| 18:01 | SAF | Ryan C | LVEA | N -> n | Transition LVEA from Upgrade laser safe to Operations lasre safe, open light pipe | 18:31 |
| 18:08 | DAS | Wanda | EX, vertex | n | Looking for glasses | 18:31 |
| 18:20 | SQZ | Daniel | LVEA | LOCAL | Look at ZM4 electronics | 18:49 |
| 19:31 | FAC | Randy | LVEA | n | Measuring around BSC1 | 19:58 |
| 19:37 | SEI | Shoshana | LVEA | n | Turning on CRS laser | 19:41 |
| 20:43 | VAC | Gerardo, Travis | LVEA | n | Checking on HAM2 pumps, disconnecting | 20:56 |
| 20:45 | SQZ | Sheila, Rahul | LVEA | LOCAL | Open HAM7 to HAM5, check alignment | 21:45 |
| 20:52 | CDS | Dave | CER, CUR | n | iopsush34 troubleshooting | 21:50 |
| 21:34 | CDS | Richard | CER | n | Checking in on iopsush34 work | 21:35 |
Sheila, Rahul
We got back into HAM7 for beam alignment work after ZM5 was repaired and, up & running. Listed below are the things we did to check and improve the alignment in HAM7 chamber and also on the SQZT7 irises.
1. Checked the incoming beam on ZM5 from ZM4, found it to be off in yaw by few mm - hence we translated ZM5 (pushing it in the direction towards SQZT7 table) to center the beam on the PSAMS.
2. Checked the reflected beam from ZM5 on the iris (which Camilla had set last week) - it was off in Yaw and was too high as well. Hence, I mechanically adjusted the pitch and yawed the suspension cage to center the beam on the iris. Sheila then checked the beam on the two irises in SQZT7. Using sliders we were able to center it nicely on the two irises, however several times while doing so we were eating up on DAC output. Hence iteratively we were using sliders and mechanically offloading Pitch/Yaw by adjusting the pitch adjuster or yawing the suspension cage.
3. Sheila also used ZM4 sliders to fine tune the alignment on the irises on the table.
Current status - we have centered the beam on the two irises in SQZT7 but we might have to mechanically offload ZM5 or perhaps ZM4 as well. ZM5 has all four dog clamps attached and baffle installed as well.
We removed the yellow viewport cover (and guillotine) from HAM5, removed the foil and opened the gate valve on HAM7 viewport (going towards HAM5) and then confirmed that the beam is injected into HAM5.
Sheila, is fine tuning the IFO alignment before aligning the two beams (IFO and squeezer) in HAM6 photodiode.
We also did some power measurements in HAM7 chamber, mainly on the OPO and then compared it against SQZT7 table. Sheila will posting the numbers later on.
Power budget: We measured 1.35mW out of the OPO, and 1.2mW on SQZT7. we struggled as usual with the reliablity of the power meter measurements, but it seems like the return beam through SFI1 has higher loss than it should, and there also seems to be power missing between the beam leaving the VIP and the beam arriving on SQZT7. If we believe this measurement we have too much loss, with 12% measured loss in HAM7 where we should have 4-5%.
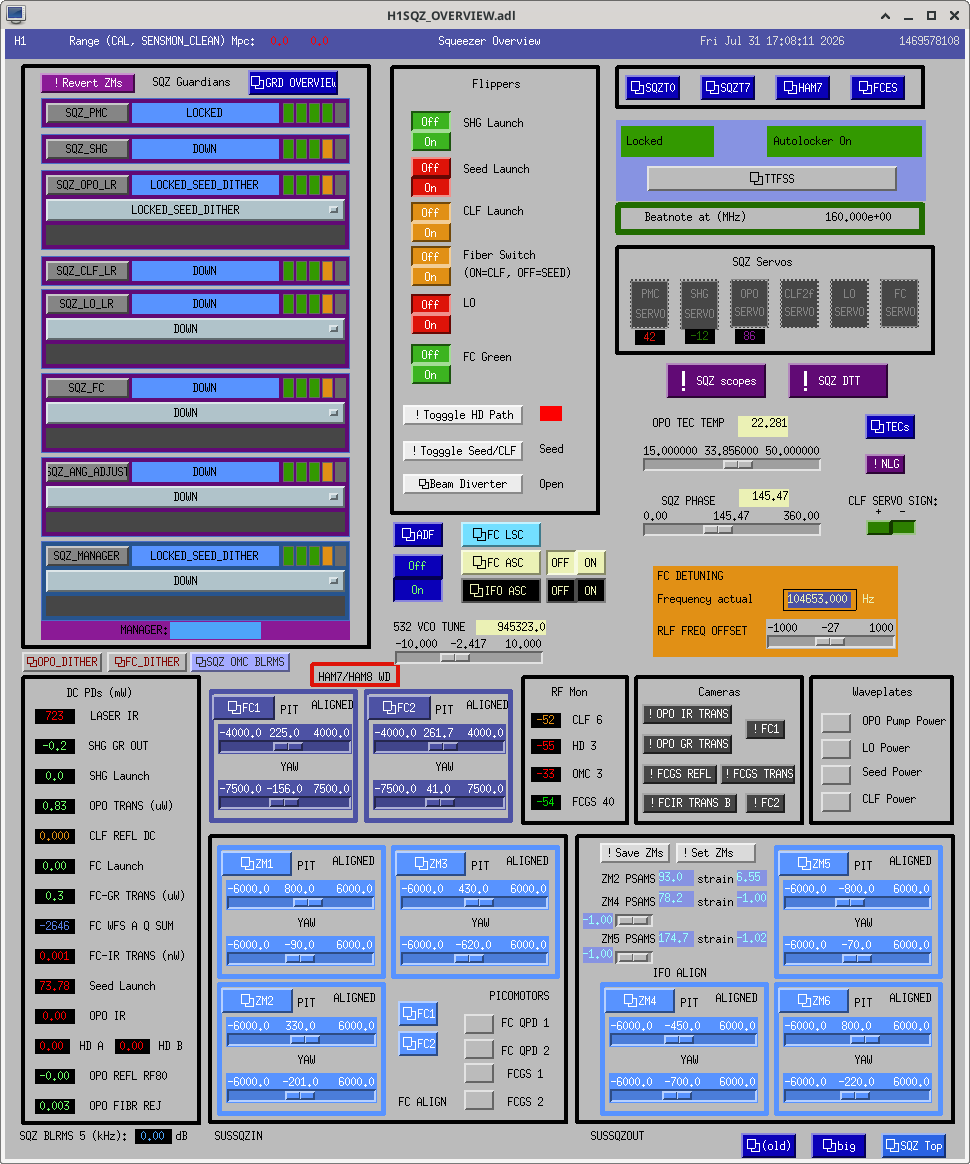
I did walk the alignment of ZM1/2/3 a little bit, we could try this more to see if we can fix clipping that way. Screenshot of where I left the sliders is attached.
Elenna and I put SR3 back to where it was in O3, aligned SR2 to center on AS_C, and ran the AS centering + offloaded. We then tried to align SRY, but could not get the fringes as high as they should be. We paused on SRY alignment to inject sqz into HAM6.
The sqz beam was on the HAM6 QPDs, we ran the AS WFS to ZM4+5 loops descirbed in 90742. This is close to saturating ZM4 + 5 but is within the range. (We would like to increase the range on these as was done at LLO to make things easier).
We set the OMC PZT offset to 0, decided to scan the psams through strain gauge values of
WP13479 Move last ADC in h1susb2h34 in front of the LIGO-DACs
Erik, Jonathan, EJ, TJ, Dave:
The 3rd ADC, which was after the LIGO-DACs on the PCI bus, was moved to be before the LIGO-DACs. EJ found that if a General Standards card followed the LIGO DACs, and there are other General Standard DACs in the chassis, then the DAC mapping became ambiguous. This was first discovered by TJ when he noticed that the LIGO-DAC card temperatures was being reported as -1C (not being read). We then found that model's LIGO-DAC drive counts were being reported by h1iopsusb2h34 on the wrong DAC MEDM.
A quick fix as to move the ADC inside the IO Chassis from after to before the LIGO-DACs
The original card layout (BIO not shown):
| empty | empty | empty | ***ADC2*** | LIGO-DAC1 | LIGO-DAC0 | 20bit-DAC1 | ADC1 | 20bit-DAC0 | ADC0 | empty | Timing | ||
| A3-4 | A3-3 | A3-2 | A3-1 | A2-4 | A2-3 | A2-2 | A2-1 | A1-4 | A1-3 | A1-2 | A1-1 |
The new card layout (BIO not shown):
| empty | empty | LIGO_DAC1 | LIGO-DAC0 | empty | ***ADC2*** | 20bit-DAC1 | ADC1 | 20bit-DAC0 | ADC0 | empty | Timing | ||
| A3-4 | A3-3 | A3-2 | A3-1 | A2-4 | A2-3 | A2-2 | A2-1 | A1-4 | A1-3 | A1-2 | A1-1 |
I was able to shuffle the cards without disconnecting any rear cables except ADC2 (SUS_HAM_209) and the MTP. The cables had enough slack to pull the chassis out to access the card screws. At the rear I was able to push the h1susauxb2h34 chassis forward to access the interface cards.
Internally only ADC2's ribbon cable needed to be disconnected.
TJ methodically started driving the top stages for MC2, PR2 and BS. We verified the model's and IOP's MEDM reported the correct channels being driven.
I trended the ADC2 channels from before and after its move to verify it is connected correctly.
Keita pointed out that the normal DIAG_MAIN whitening check doesn't currently cover the OMC DCPD external analog whitening (state of which can be seen on H1:OMC-DCPD_{A,B}_GAINVAL, 0=high 1=low), and the corresponding digital antiwhitening for it at FM2 on H1:OMC-DCPD_{A,B}0. This is now in DIAG_MAIN's whitening test.
While I was looking at this test, I noticed it was quite out of date with the whitening overview screen. I pull all of the names from that screen and made a new list for the DAIG_MAIN test. There were only additions from the old list, so I don't think we dropped any sensors. I commented out some BHD sensors until they are fully ready.
Jenne, Wanda, Shoshana, Gizem
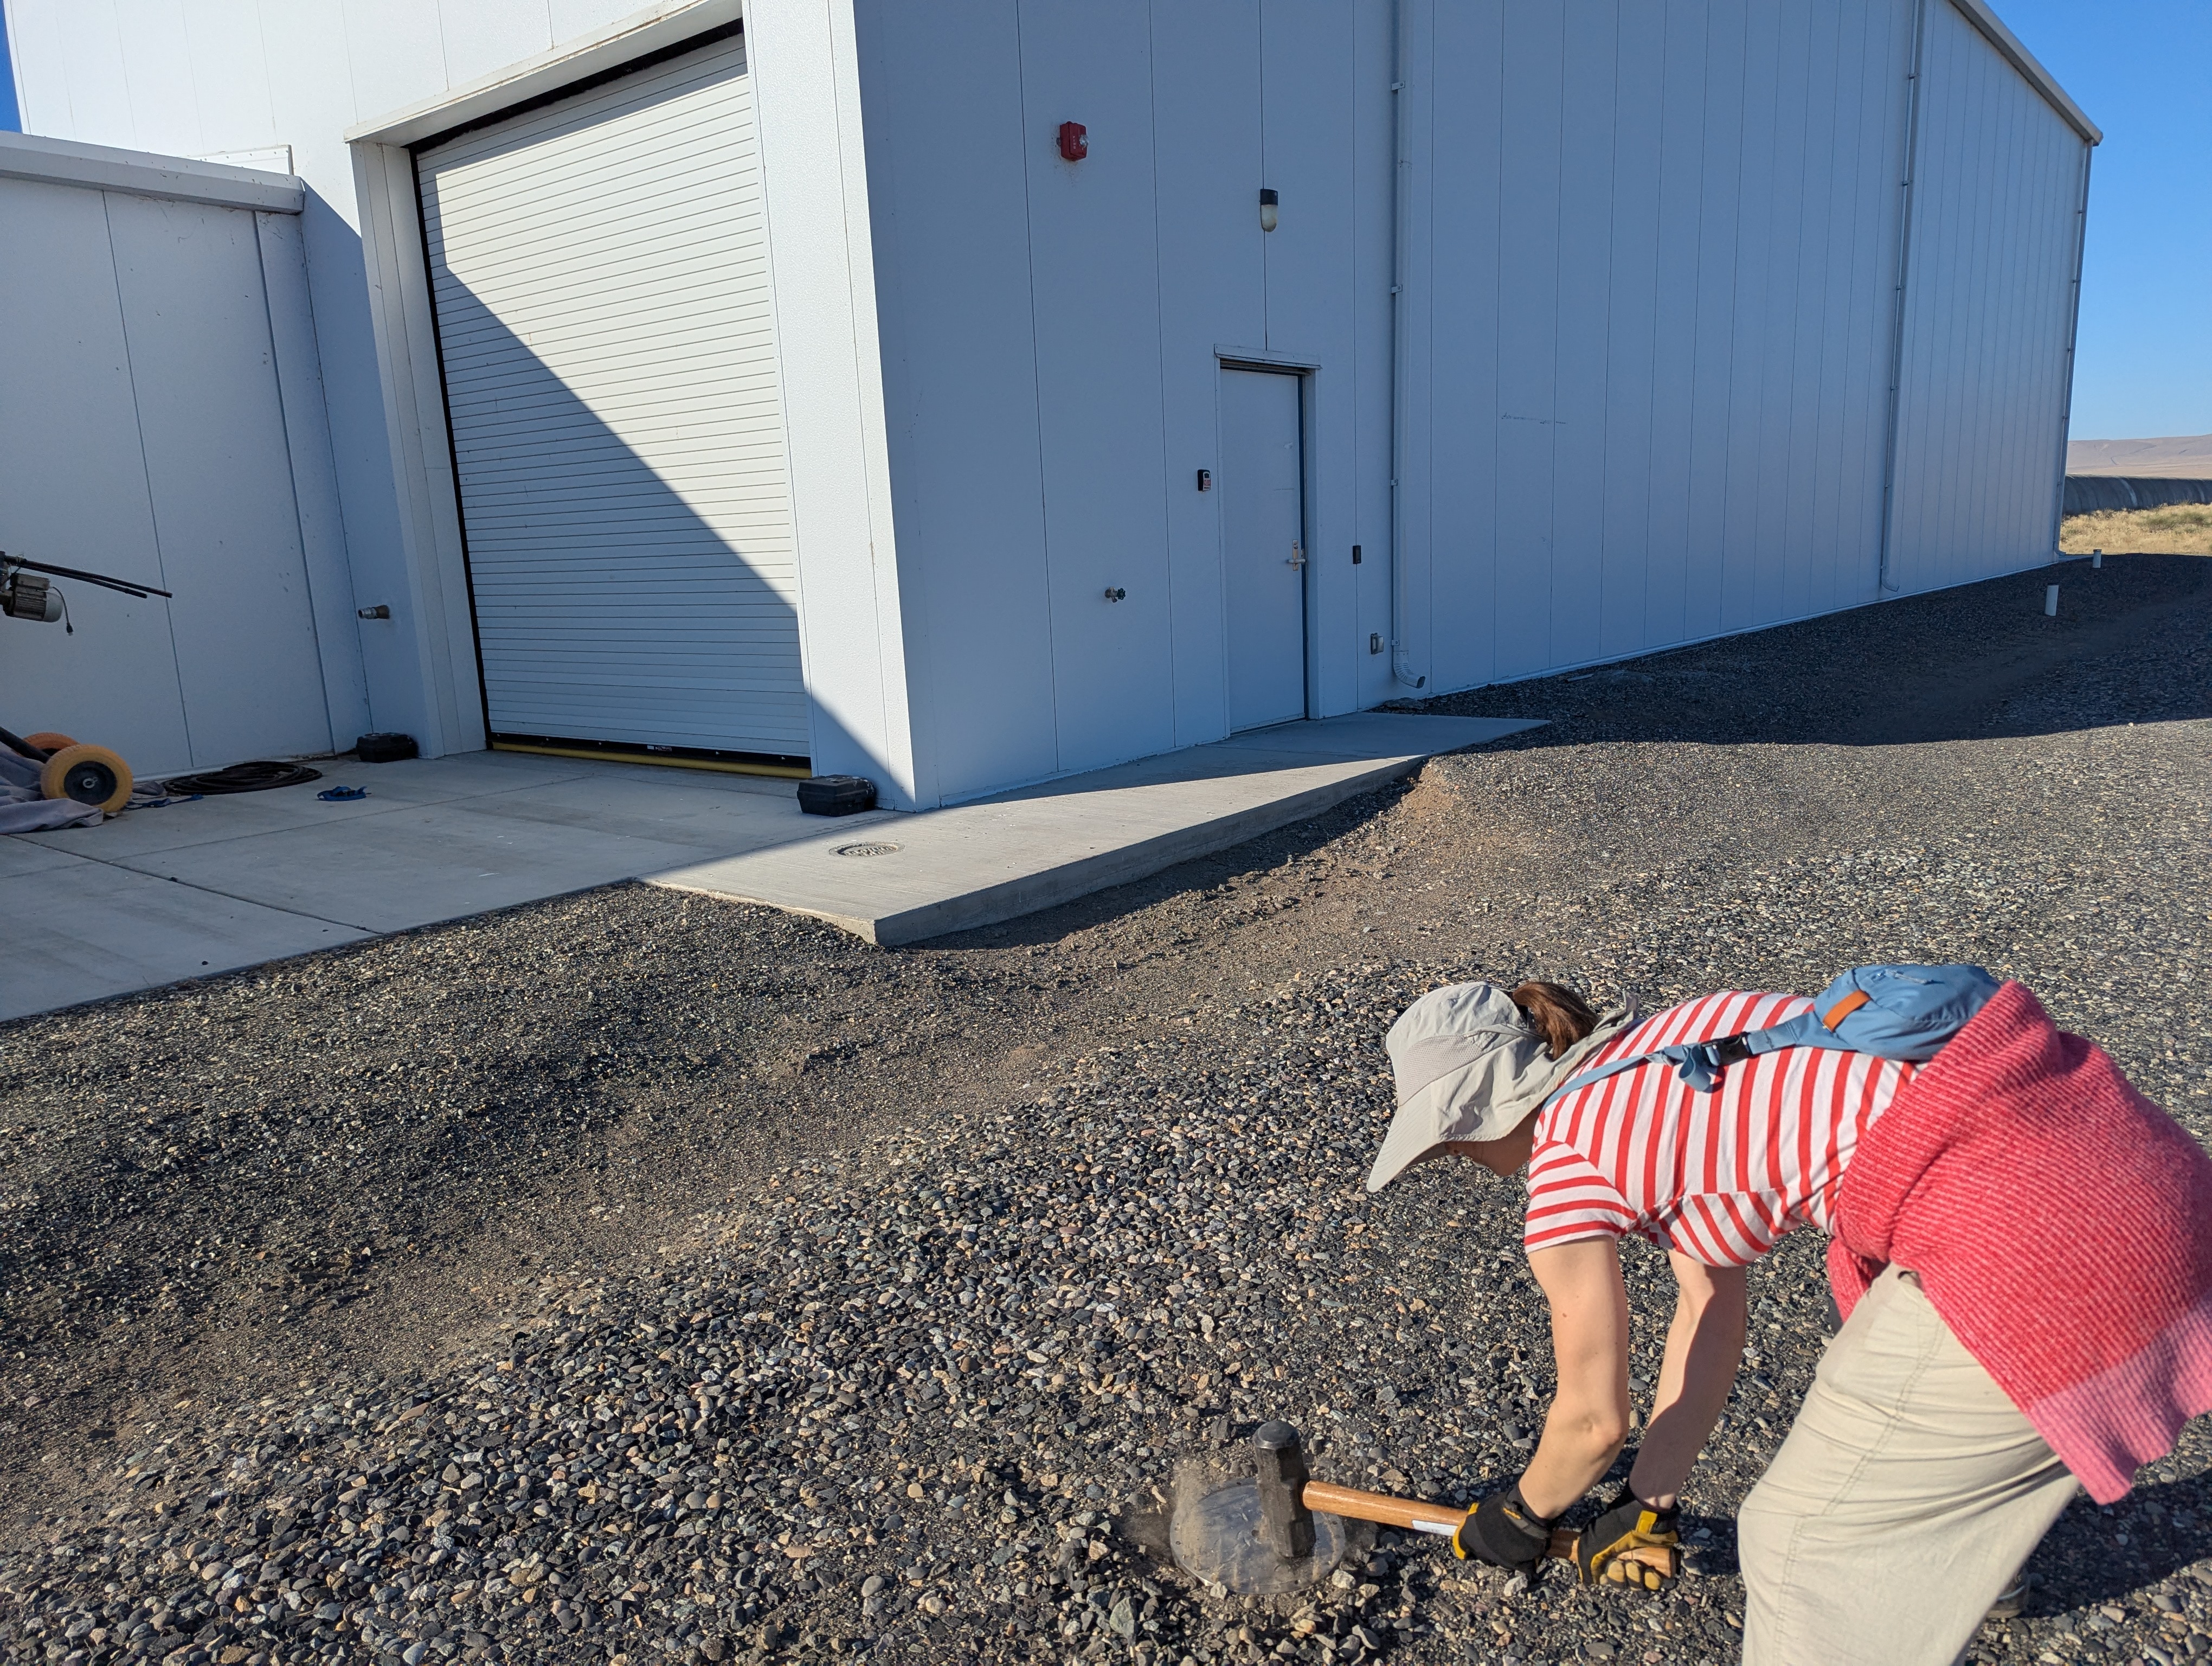
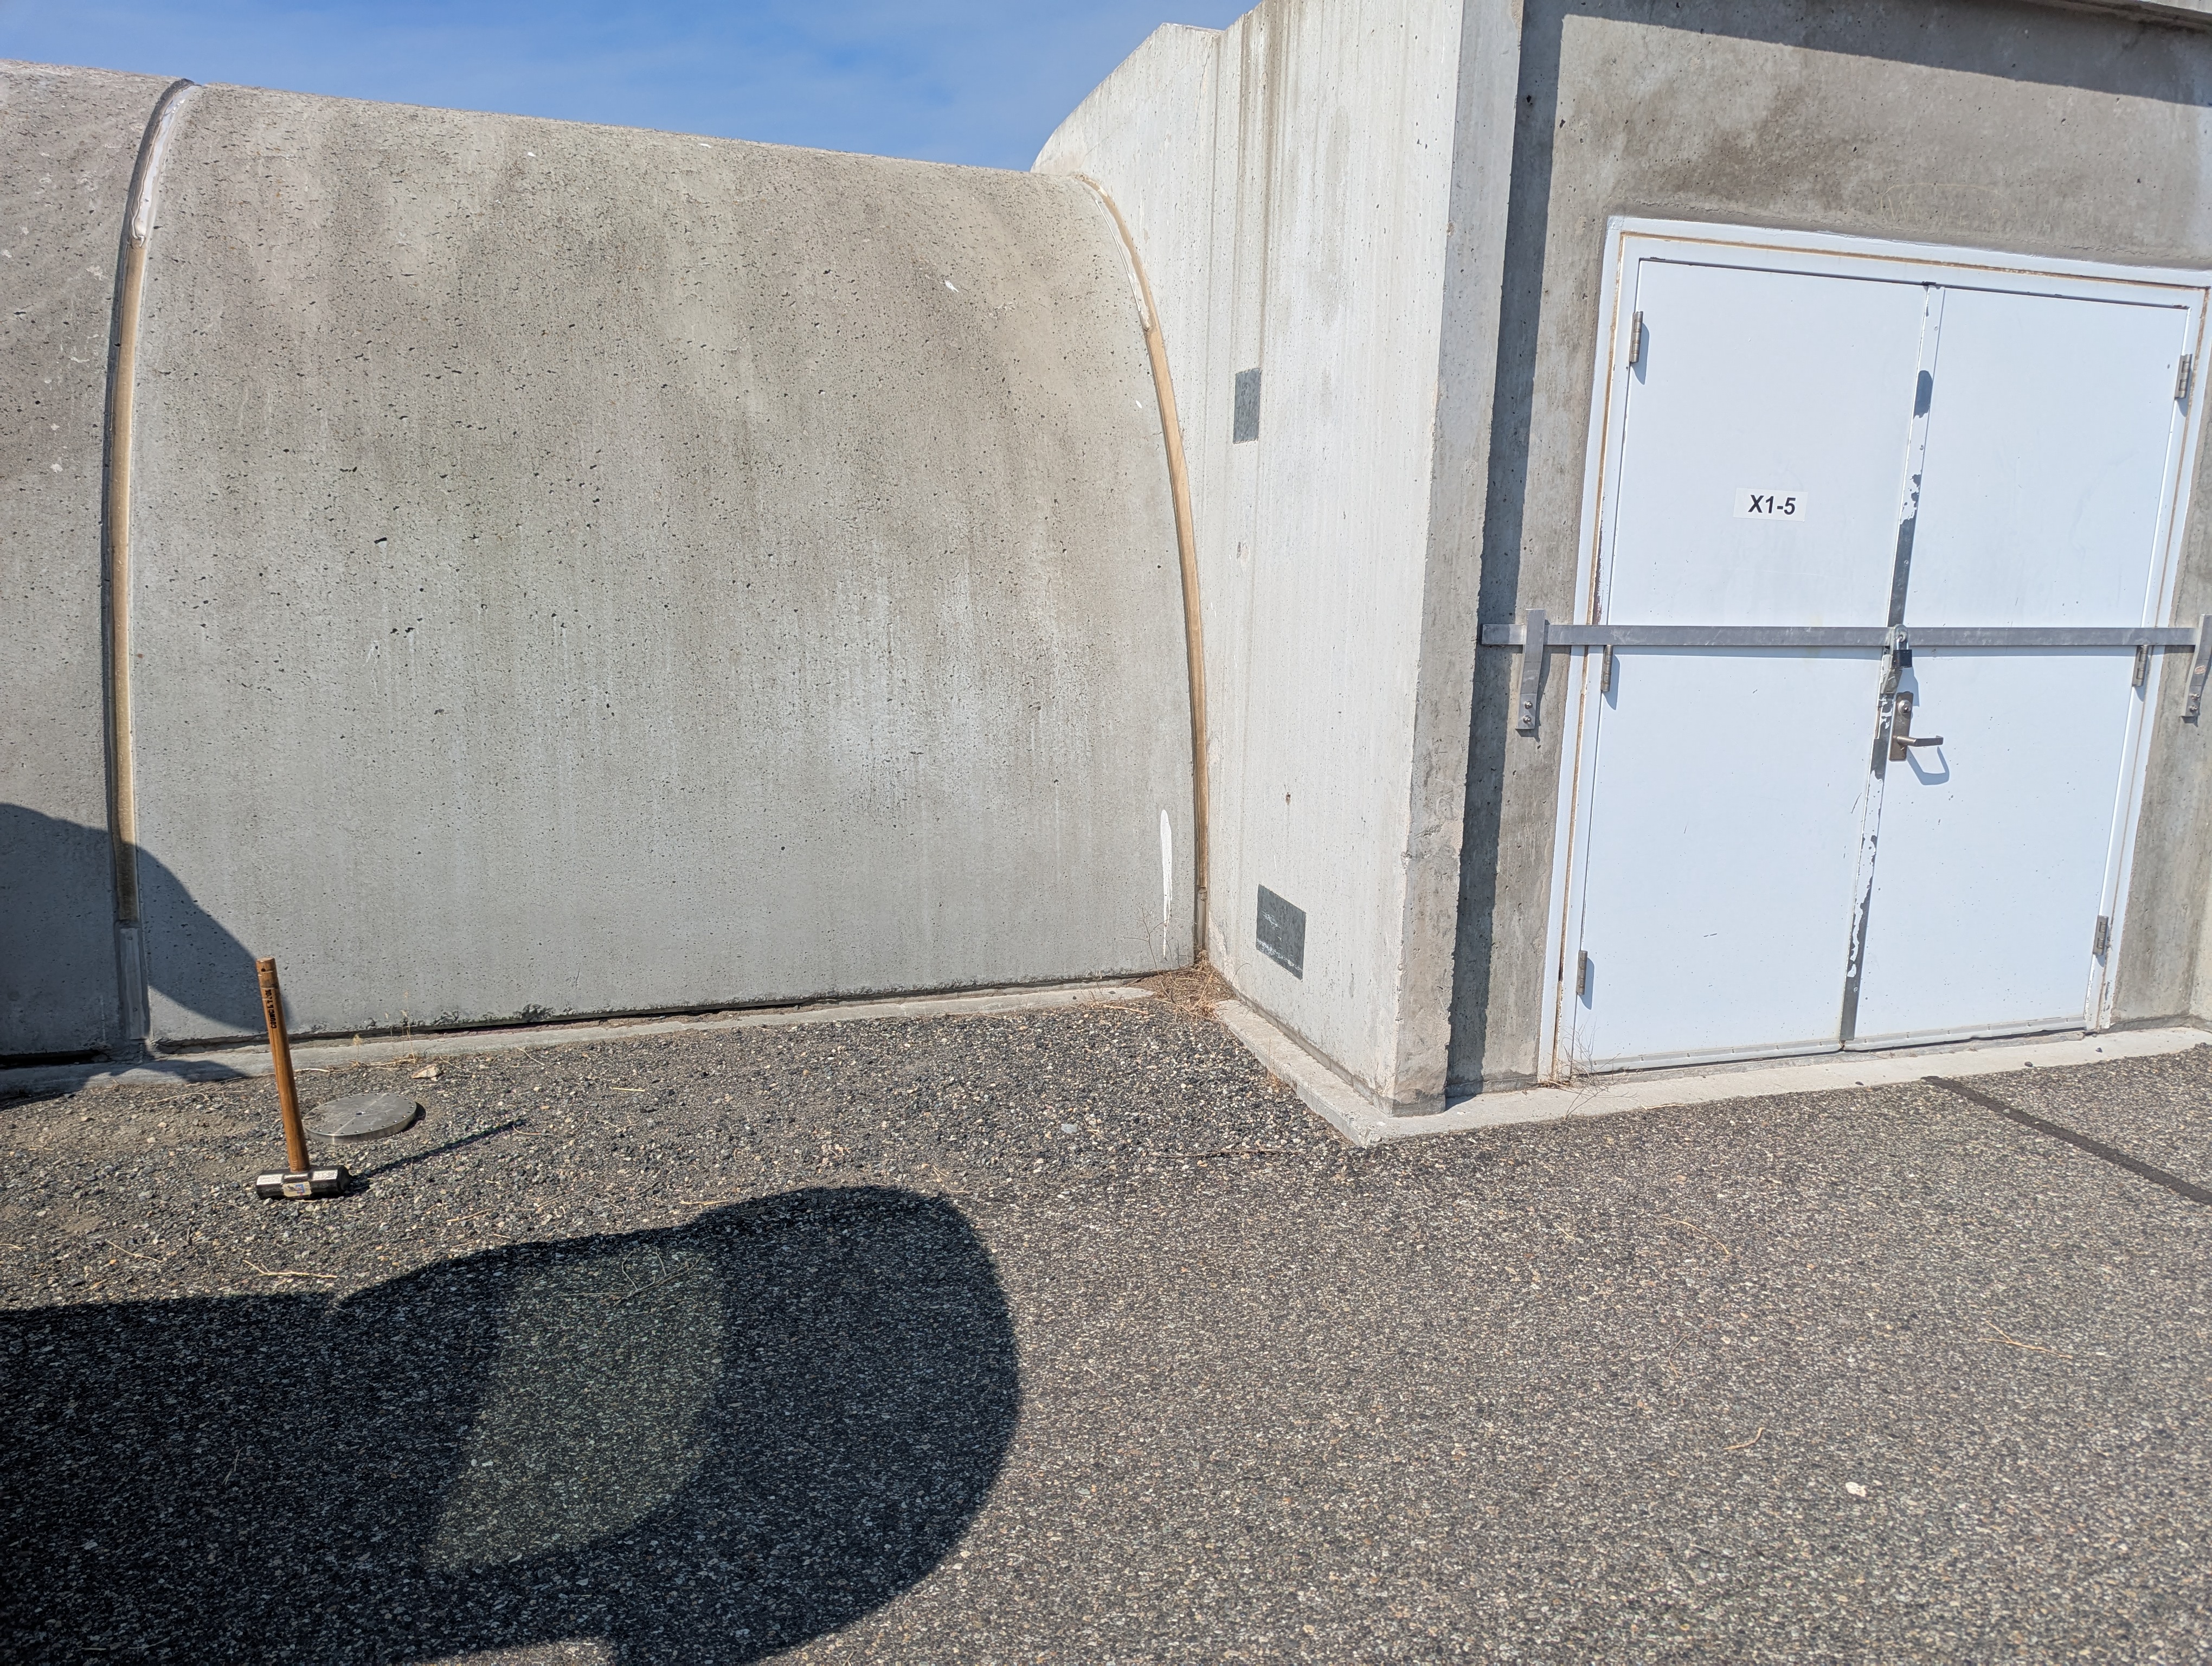
We started very early this morning to beat the heat, and performed 'tap tests' at various points along the length of the arms to identify positions along the length of the fiber (according to DAS) with GPS positions (according to Wanda's phone).
Spreadsheet attachment is information about where along the fiber Shoshana and Gizem identified our tapping in the data, and associated time stamps. I've also copied the spreadsheet data to a google sheet, so that we can add to it.
We tried to do more dense taps on the 'inside of the vertex' side of the arms, where the fiber actually is. This required some walking out in the sand along the arms, so we had sun hats and knee-high boots and plenty of water. We also did a few taps along the road during our drive back, to get some more coarse information along the length of the arms. At the Xend station, there were too many tumbleweeds for us to walk along the inside-vertex side of the arm, so there at EX we did our more dense taps along the road side, with the exception of the EX vault location.
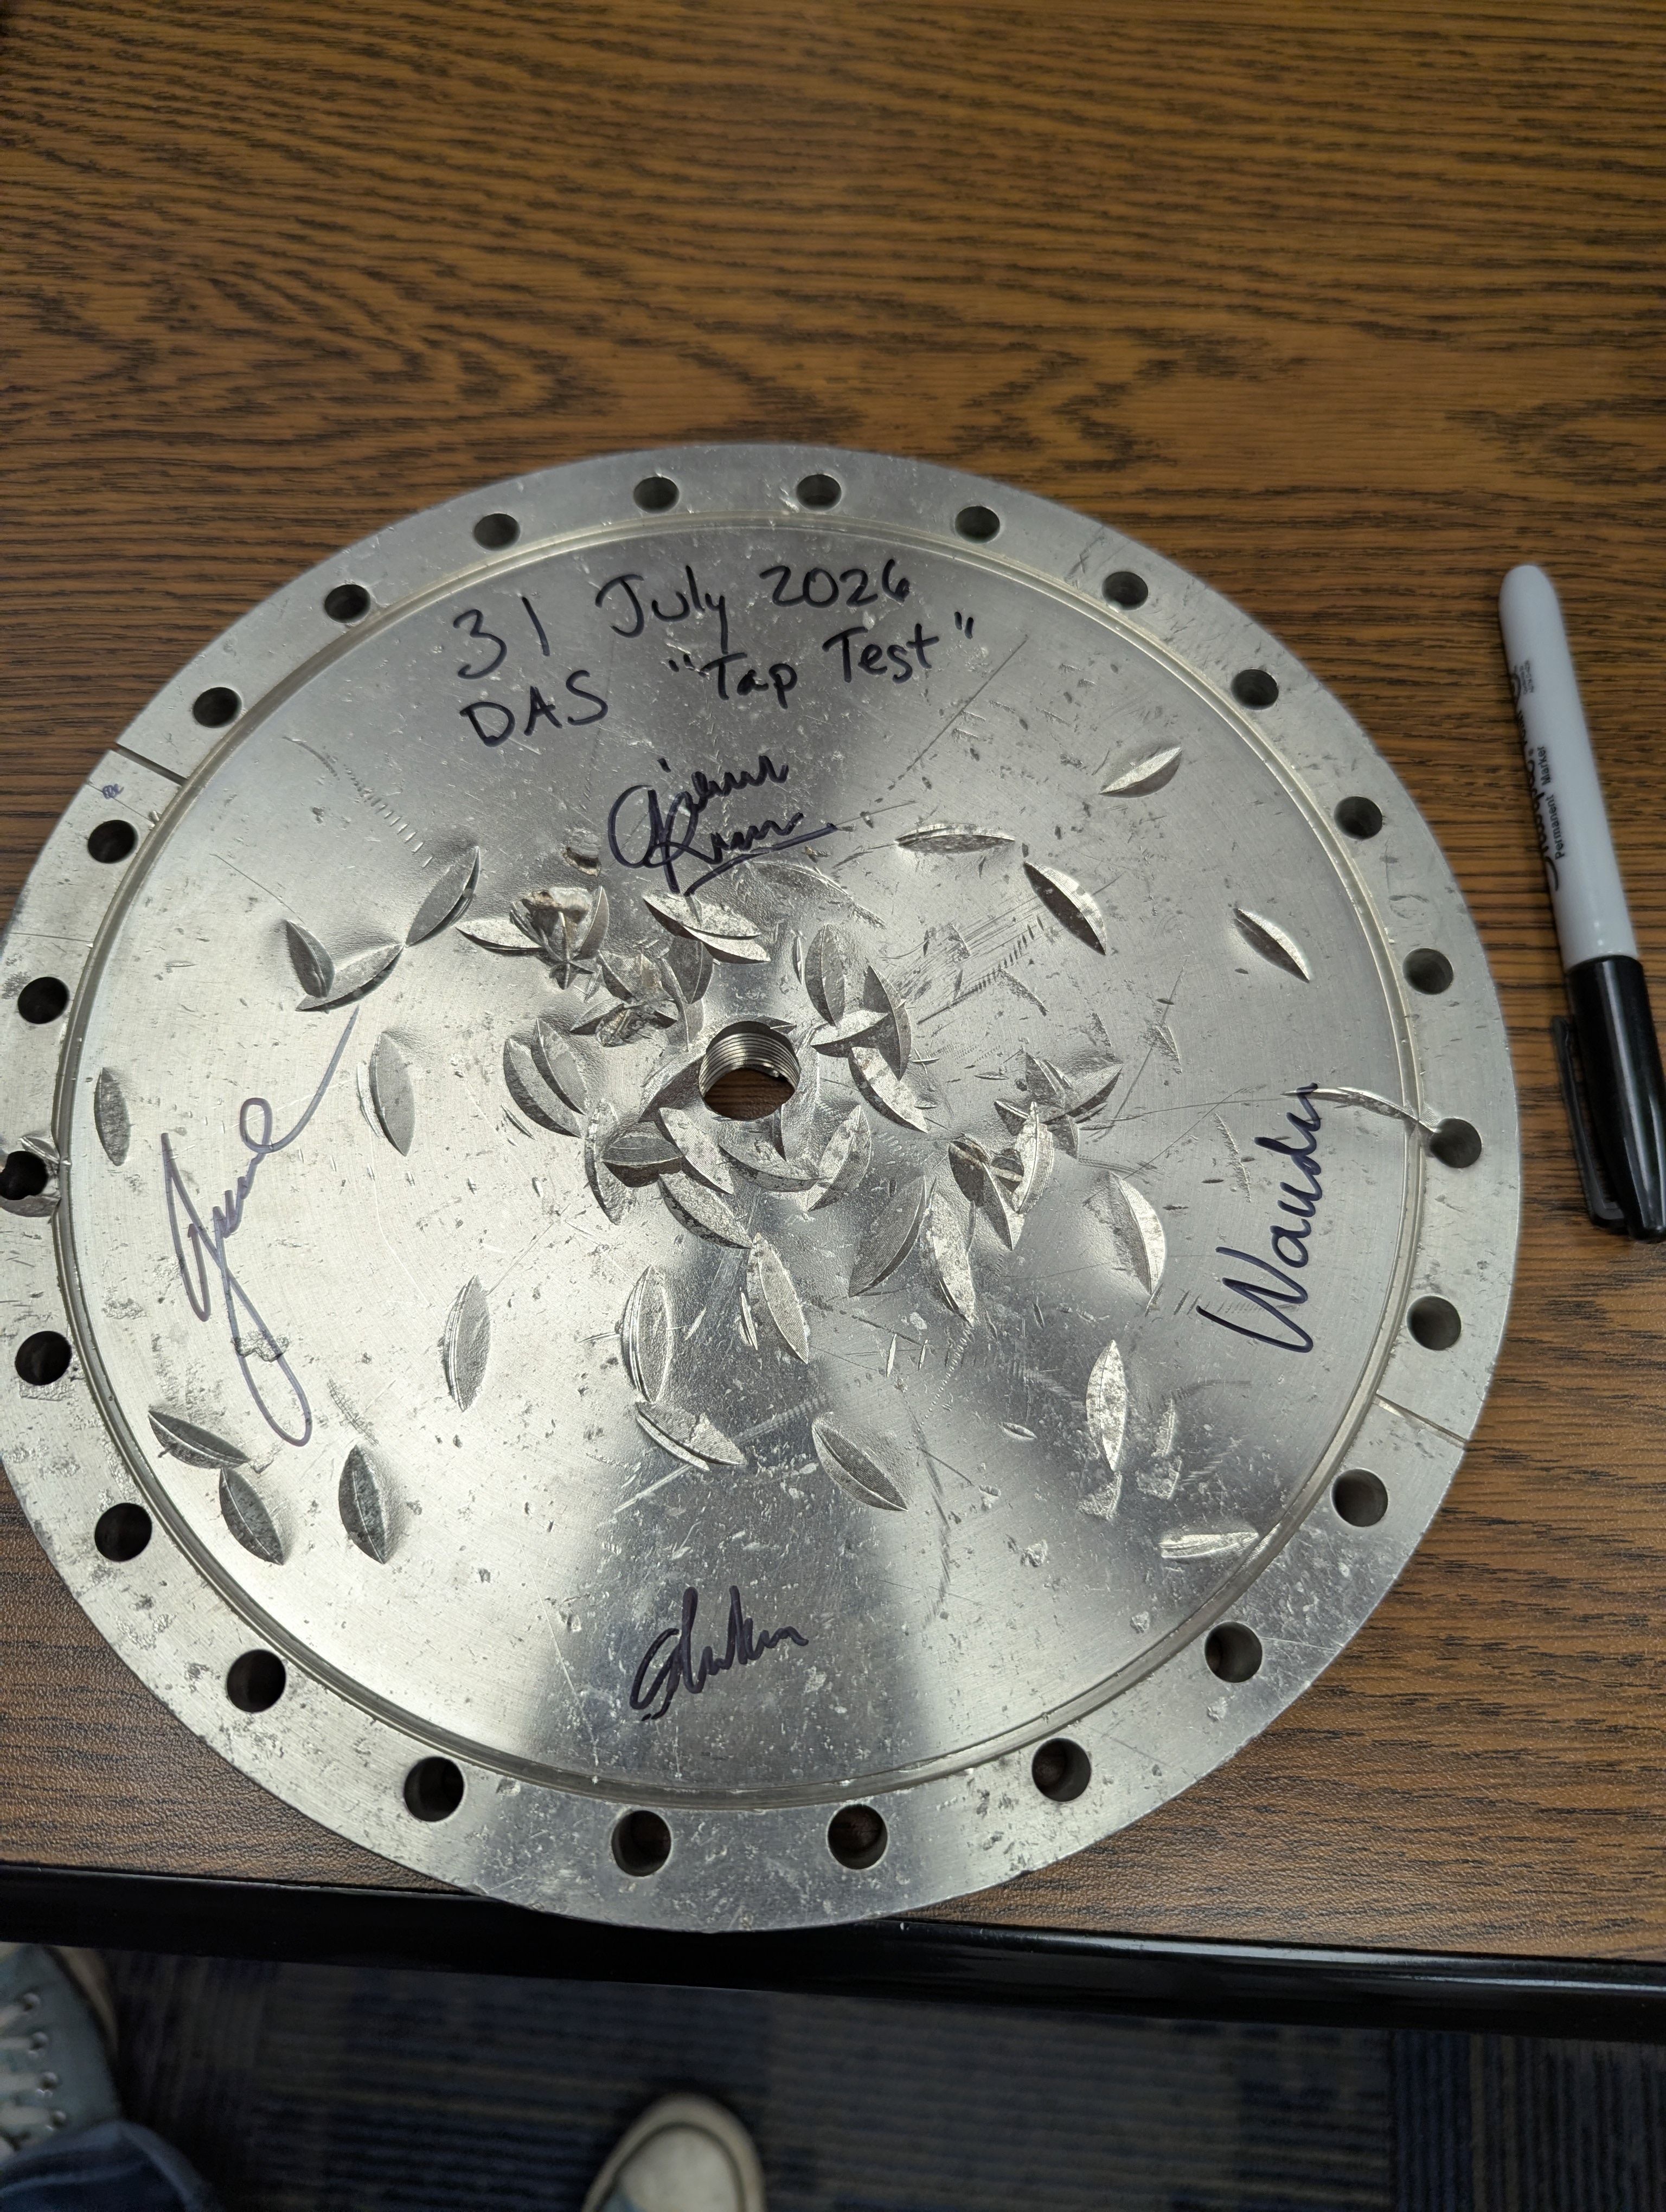
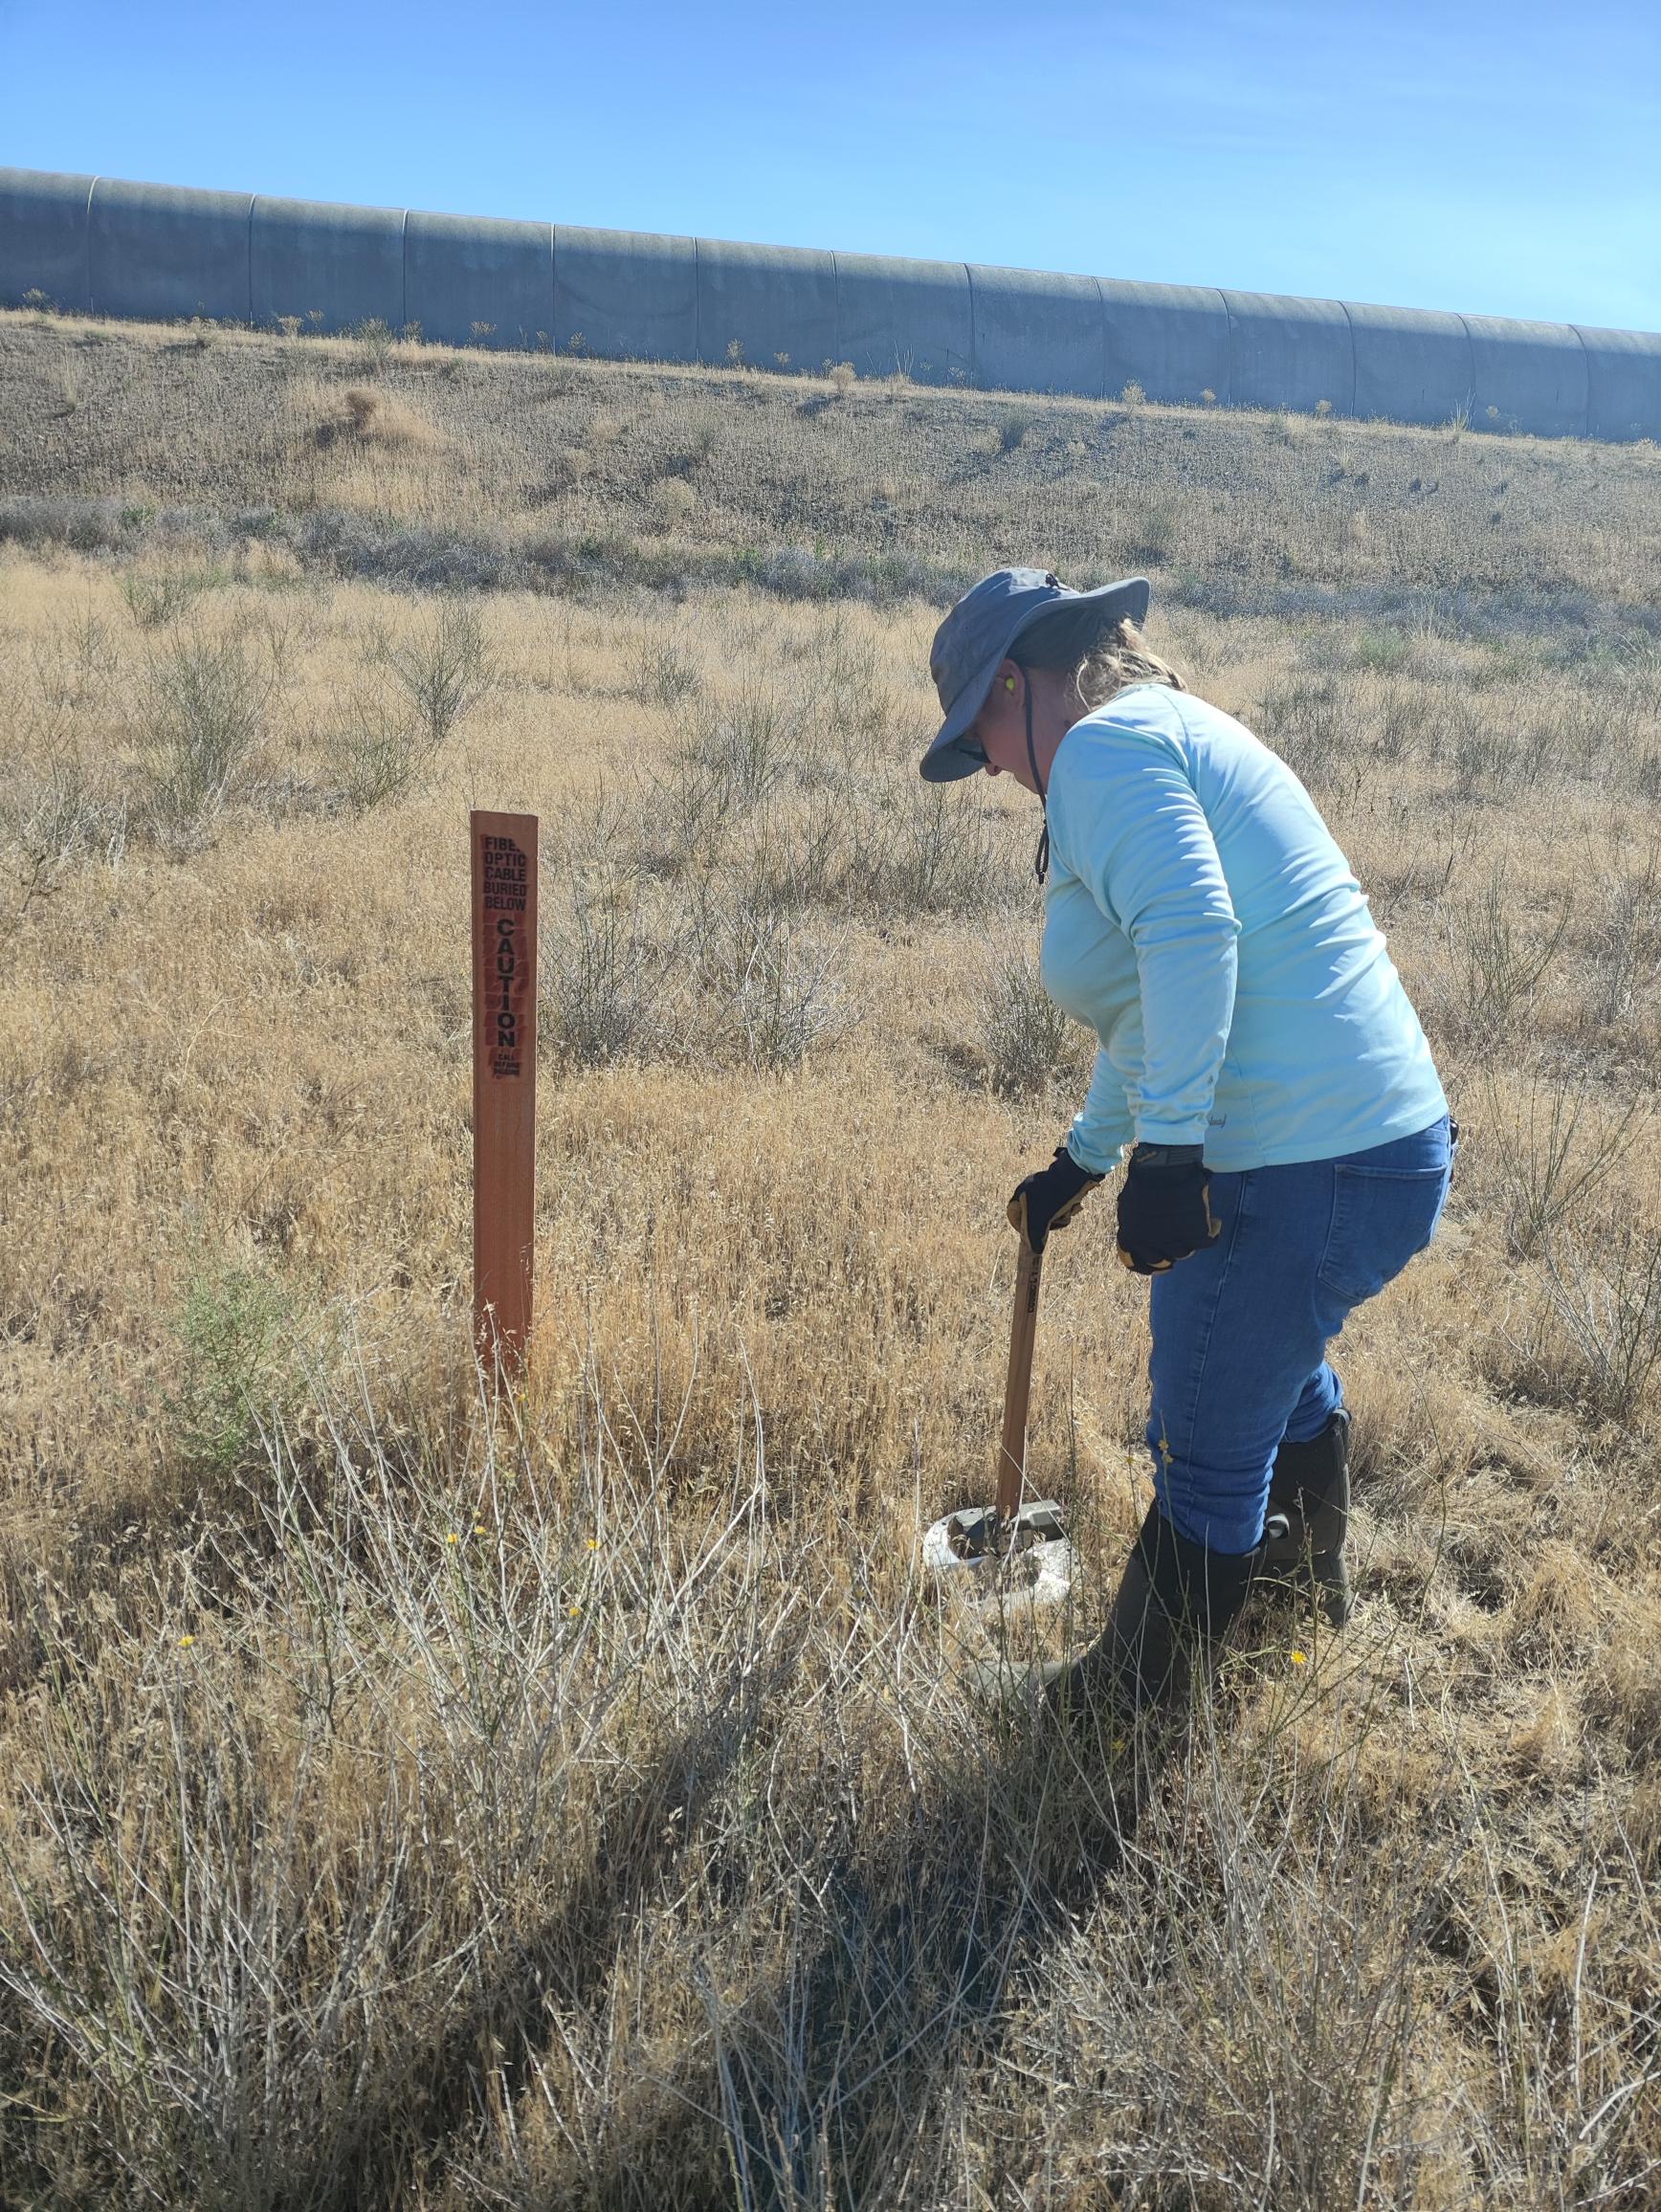
In the attached photos, you can see some examples of our tap test method. Gerardo provided us with a scrap piece of steel that we used as a strike plate. We also borrowed a sledgehammer from the mechanical / vacuum parts lab. For most of the Yarm, we only did 3 heavy strikes and Gizem and Shoshana chose the strongest signal from that as our time. Once we were on the road-side of Yarm, and then for all of Xarm, we added some light tapping that seems to have helped identify which distance bin (called a "channel" in DAS terminology) we were closest to. The photos are also labeled with X/Yarm, and position number, which corresponds to the position numbers in the google sheet - I tried to capture features in the photo to help identify where exactly the strike plate was.
Wanda has added to the google sheet the GPS locations that she identified while we were at each tap point.
The last photo shows our used (but can be used again in the future!) strike plate.
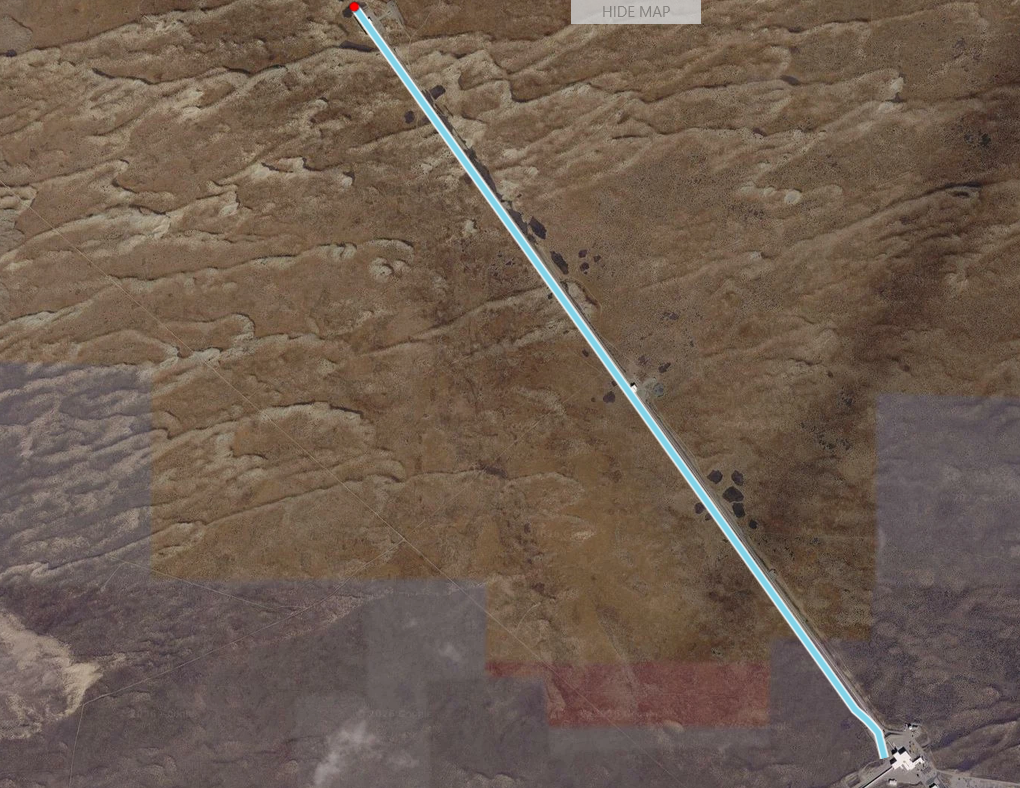
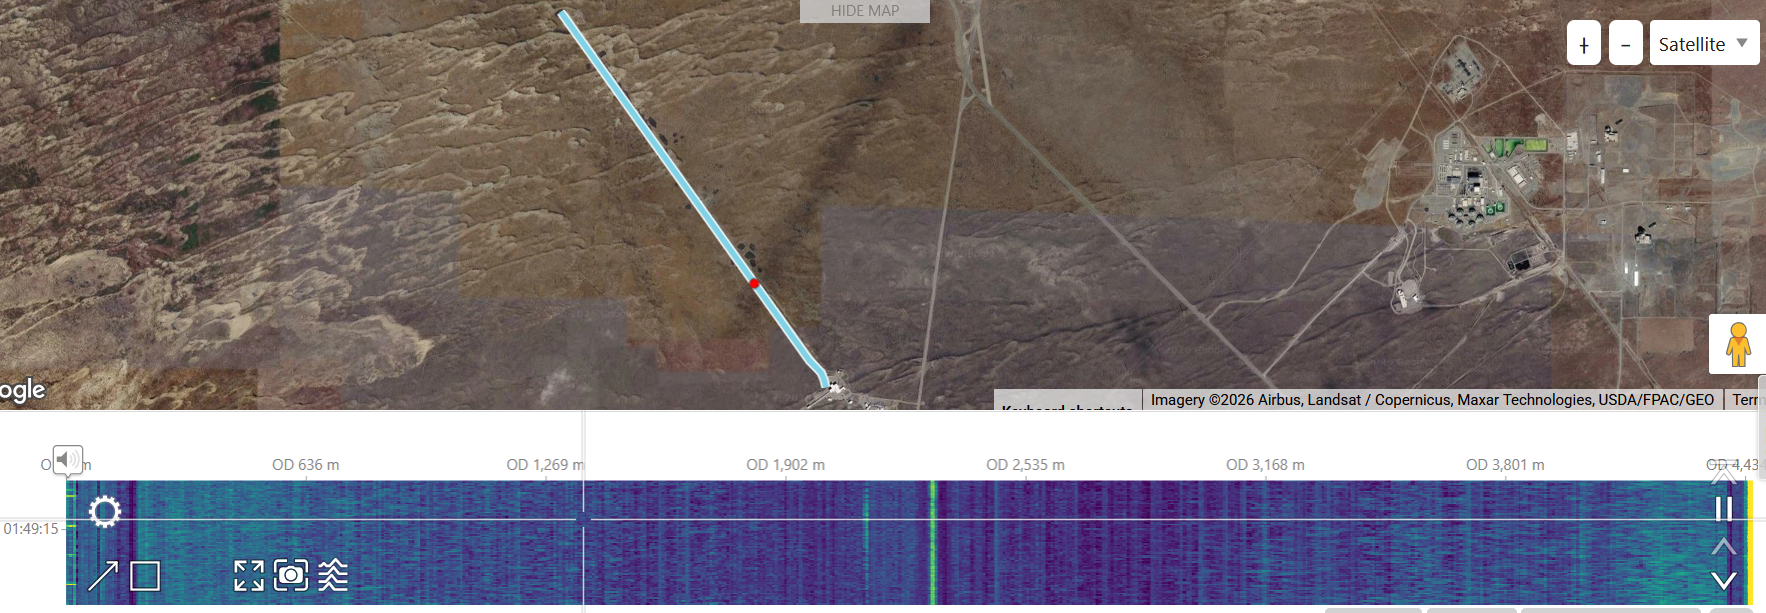
I have attached some screenshots which show what the referenced path looks like for the x-arm. Further, it demonstrates how the optical metres of the fibre are now referenced to a certain co-ordinate. With this, we can now correlate any events that we detect to a physical location. In this software, a straight line is drawn between two referenced points. In picture 1, the whole arm is shown. In picture 2, it is zoomed in on the area around the corner station, showing the limitations in our technique as it is relatively rough considering we know the fibre is curving at this point. In picture 3, we see how hovering over the waterfall plot will produce a red point in the refenced fibre showing the location of this channel.
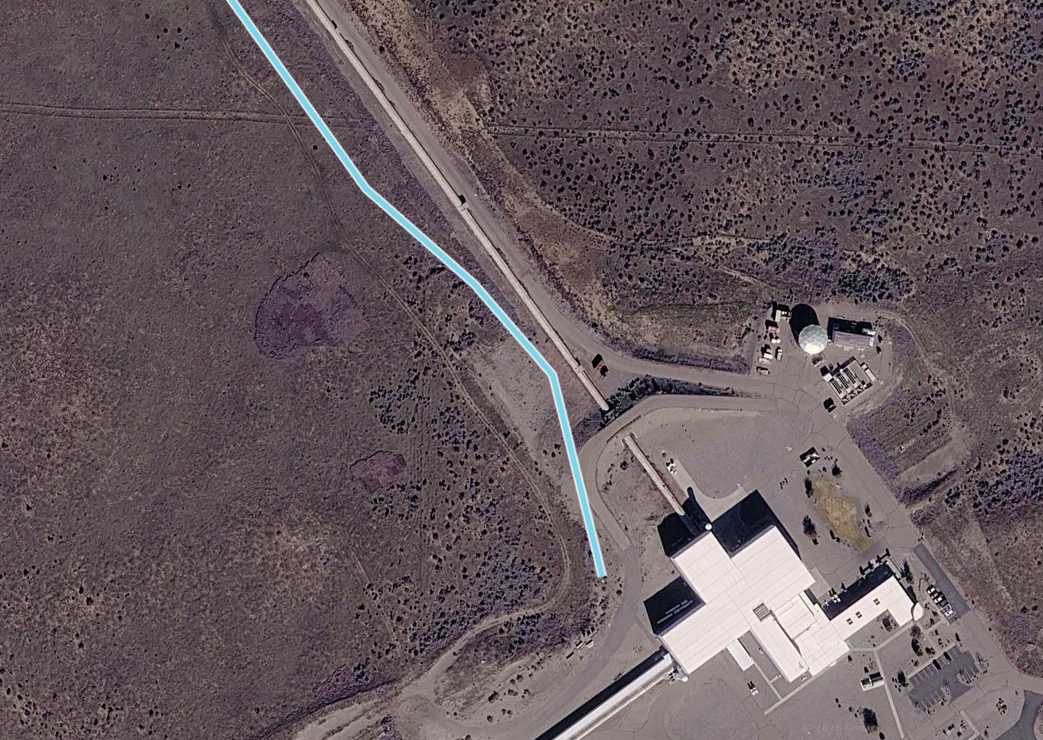
And here are some more pictures of the georeferencing.
I ran the charge measurements for both ETMs this morning. Unfortunately a medium (5.2 from Mexico) earthquake rumbled through from 16:38 to 16:58 UTC, but it didn't seem to effect the errors and coherences noticeably enough for me to restart the measurement.
For ETMX:
I was consistently getting low coherence for LL in Yaw, the charge appears to have plateaued or seen small increases (the error bars from the last measurement overlap with this one on all DOF/quadrants) on most DOFs/quadrants. The charge is above +\-50[V] on UR_P and LR_P, LR is still slowly trending to zero. ETMX is also quite misaligned as seen by its OPLEV.
For ETMY:
I was also seeing the worst coherence and largest errors on LL, both P and Y. The charge appears stable, there's not much difference from this measurement to the second to last (most recent one has large errors so it's not as valuable of a comparison). The charge is above +\-50[V] on LL P and Y, and UL_Y, there were some small increase of charge on LL as well.
Late post for DAS setup work on Thursday yesterday. Jenne, Wanda, Gizem, with Jonathan and Nyath helping get our remote access set up.
* EX, Fil connected a patch cable between fiber chassis and our termination fiber. This patch cable was FC-APC on the end that was connected to the fiber chassis, and FC-UPC connected to the FC-UPC termination cable. We were trying this mismatch between the FC-UPC of the chassis to a patch cable, in hopes that that would reduce any etalon effect between the UPC-UPC connectors. It didn't seem to help much.
* Xarm, Did a test for a while where Fil connected both our DAS channels to 2 fibers (#23 and #24) on the Xarm, to see if that made any difference in the noise; no impact, so eventually went back to just using #24 on X and #24 on Y.
Eventually we realized that the reason the data looked noisier is that we had changed some acquisition settings (effectively, changing our averaging). So, nothing actually changed in the overall performance of the system, which is good (we had thought that somehow we made it much worse between Mon and Wed).
We started an overnight data set using 500 Hz sample rate, to see that hopefully this is an okay balance between big file sizes and going up to high enough frequency to be useful. Xarm was connected to the Febus instrument, and Yarm to the Sintela instrument.
Also in the afternoon we got the remote connectivity working for both the Sintela and the Febus instruments.
Jonathan, EJ, Erik, Dave:
The first step in fixing h1sush12's IPC errors is to replace the fiber and switch SFP. I've put SEI SWWD for HAM1 and HAM2 into bypass mode in preparation for this.
Jonathan will perform the swap in the MSR.
This will be a hot-swap, no models need to be fenced, stopped or computers rebooted. Very different from the "Dolphin crash" days.
Here is the CDS overview while h1sush12's fiber/SFP are being swapped out.
Replacement completed. I have unbypassed the SWWD for SEI HAM1 and HAM2.
Jonathan replaced the original fiber FMM-02M-1120 and installed FMM-02M-1111. sw-msr-ipc0 port3 SFP was replaced.
(Travis S., Jordan V., Gerardo M.)
Today we replaced the ion pump for HAM2, but since the annulus system is shared with HAM1, both annulus ion pumps were powered off (HAM1 and HAM2), and the entire annulus system was vented with nitrogen gas. The AIP for HAM2 was removed, along with an elbow, the elbow was replaced with an isolation valve, we used a second hand O-ring valve because the new valve turned out to be short by 1". After torquing all bolts on the ion pump and on the "new valve", the system was pumped down by a can turbo at the isolation valve and backed by an aux-cart, no issues pumping the annulus system down, since the aux-cart gauge already reports a vacuum pressure of 4.5X10-05 Torr. BTW, the can turbo at the top, flex hose and aux-cart will remain pumping on the annulus system until good vacuum pressure is achieved, and they will be a noise source.
Note for future work here: The pipes that make up this annulus system does not allow for an easy installation, during installation a person has to lift up on the pipes, while a second person pulls outward on the pipe to give space at the conflats to insert the copper gasket. The tension on the pipes is something that we noted during the removal of the old ion pump, when the conflats were being unbolted, the gap between both increased on its own, showing us how much the pipes were flexed upward.
(Travis S., Jordan V., Gerardo M.)
HAM2 annulus system pumpdown is done, Jordan Isolated the system earlier on the week from the aux-cart, ion pump took over the pumping with no issues. Today, taking advantage of a computer reboot, Travis and I removed the flex hoses and can turbo from the annulus system. Aux-cart and components were moved away and stored away from the chambers. BTW, this time we only used one aux-cart for the pumpdown process. HAM2 annulus system is back to nominal.